Step-by-step guide
After opening EE10, the user has a number of different ways to create a new project model.
- The first way, the user click Model button on main menu toolbars, then select New Model (see Figure 1).
- The second way, the user click New Model button directly on main menu toolbars (see Figure 2).
- The third way, from keyboard, press Ctrl+N.
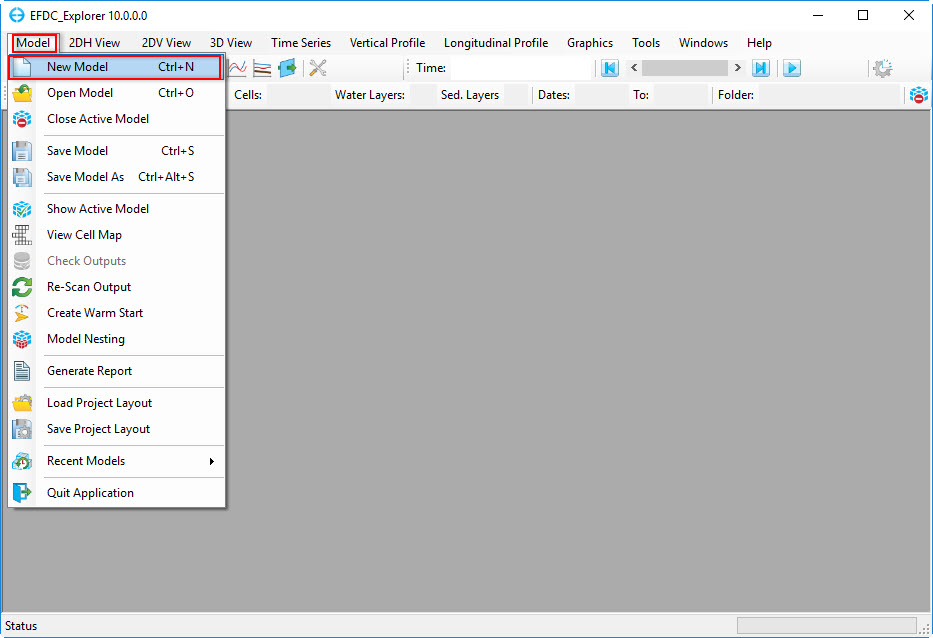
Figure 1 New Model (1).
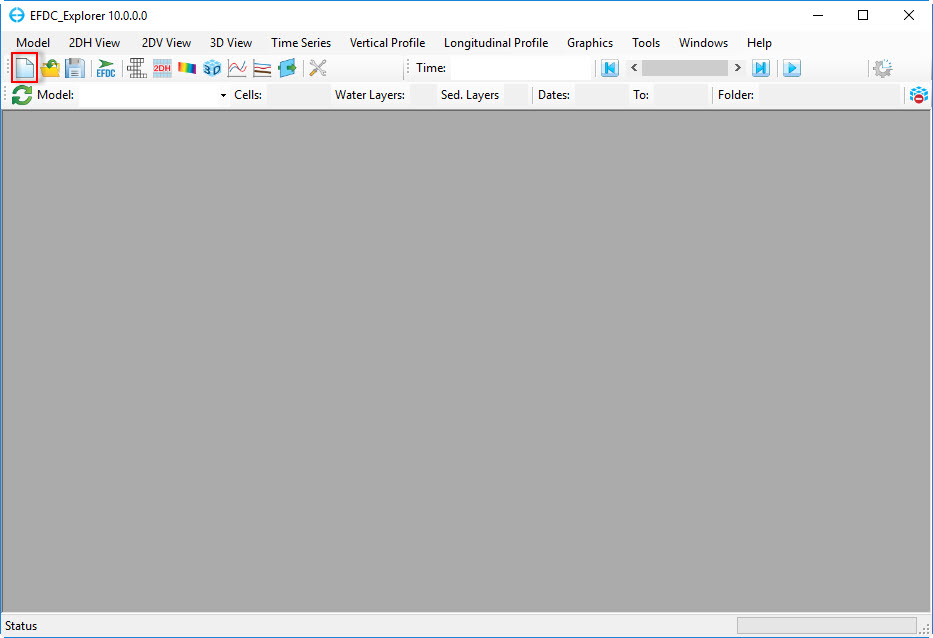
Figure 2 New Model (2).
After one of three ways above is selected, the form GridTool appears. From this form, the user have four options for grids.
- Import Grids from Files: this option allows user to import an existing grid file, type of grid can be one of these types as CVLGrid, RGFGrid, etc. Multiple grid files option can be used by check the box if the user have some sub-grids for a waterbody. Then Browse to the grid file and click OK button to finish. (see Figure 3 and Figure 4).
- Generate Uniform Grid: this option allows to generate Cartesian grid. The user can define gird cell size and number of cells (see Figure 5).
- Generate Radial Grid: this option allows to generate radial grid ( see Figure 6).
- Generate Telescoping Grid: this option allows to generate telescoping grid ( see Figure 7).
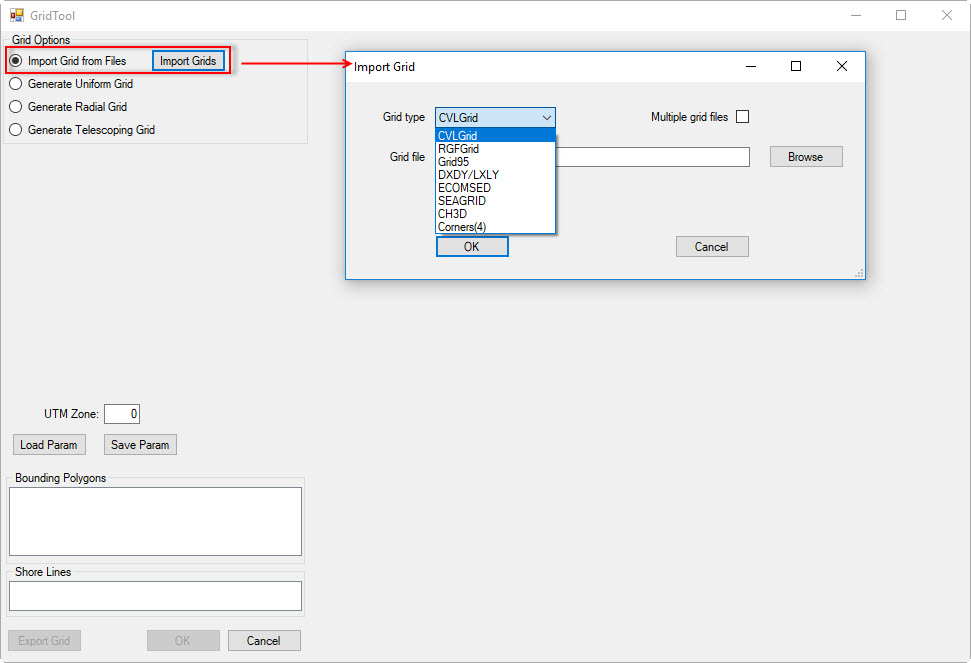
Figure 3 Import from existing grids (1).
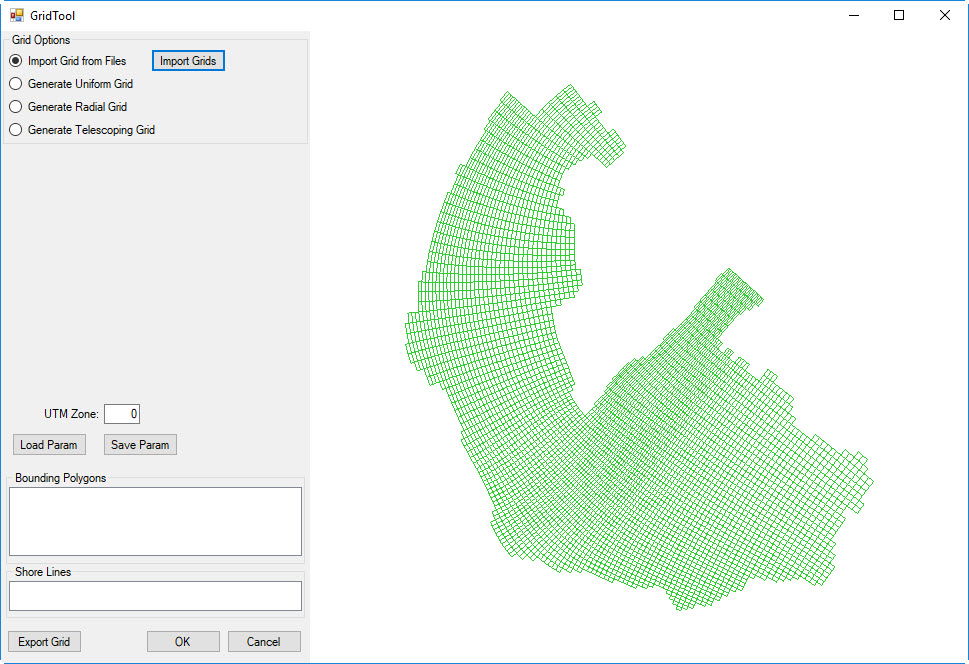
Figure 4 Import from existing grids (2).
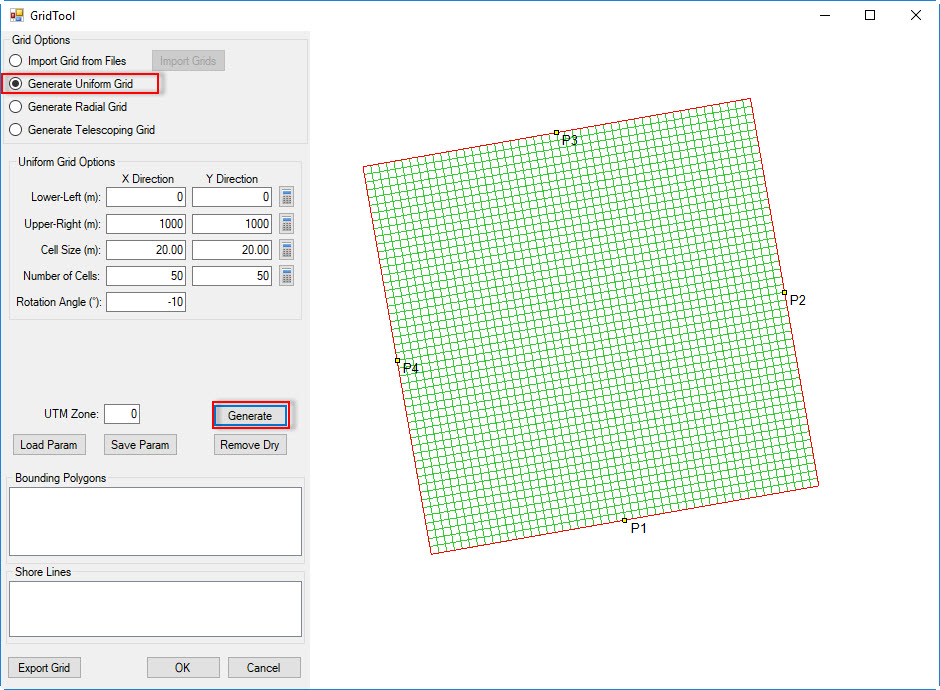
Figure 5 Generate Uniform Grid.
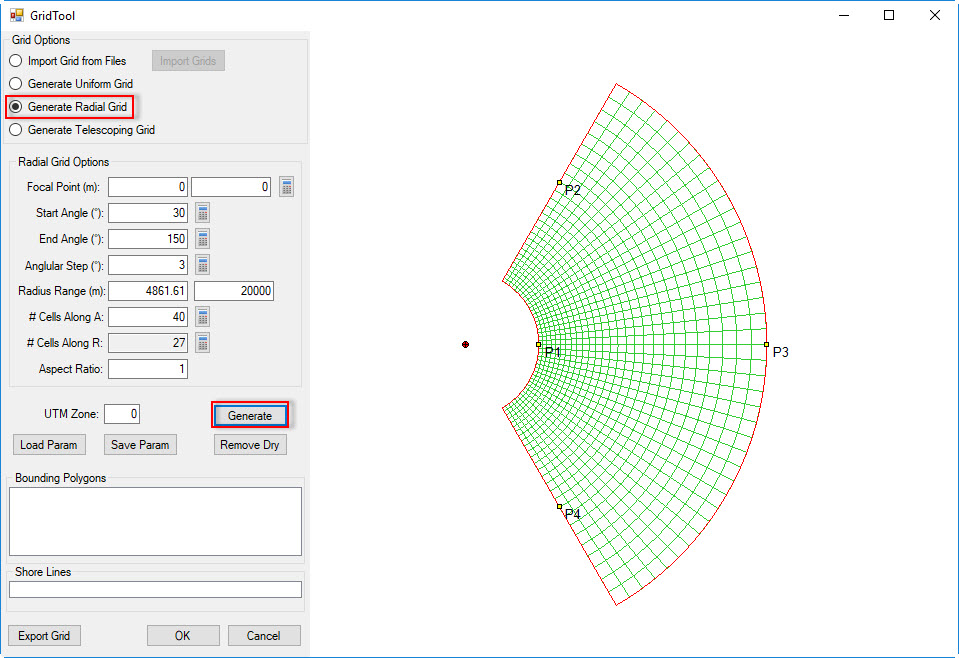
Figure 6 Generate Radial Grid.
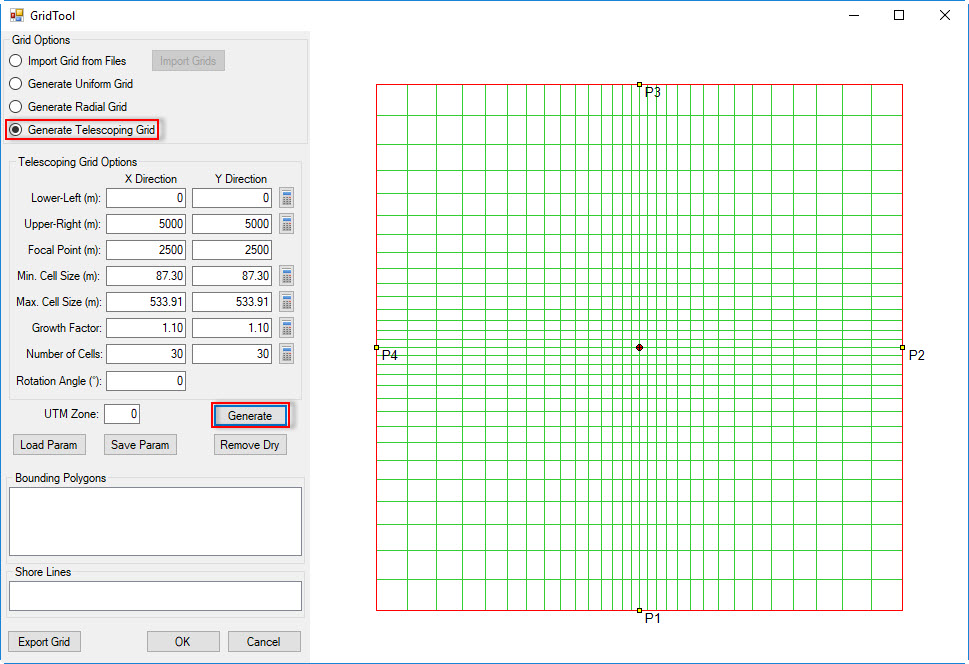
Figure 7 Generate Telescoping Grid.