The basic requirements and restrictions for running MPI were are discussed under MPI on a Single Machine. This page focuses on setting up the cluster option, which allows a model to be run across multiple computers simultaneously. This option requires a master PC where the model is set to run and any number of slave PCs. The configuration of this kind of system is relatively complicated and will likely require the support of an IT administrator. The setup requirements are described below:
1. Requirements for All Computers on a Cluster (Master & Slaves)
Connect all computers running a Windows OS (best if they all have the same operating system, e.g. Windows 10 build 1809) with a Local Area Network (LAN).
It is recommended that all the computers in the cluster have been logged in with the same Administrator account and password. The user can create the new user to have the same username for all PCs.
Install Intel MPI Library for Windows which is available from this link. The user must install the same version of the library on all machines.
Open the Command Prompt with administrator permissions (run as Administrator) and use the following commands to determine the usernames and domain names of the computers
> whoami
domain-name\user-name
Next, invoke the following commands to set up the Hydra process manager:
> hydra_service -start
(Note: In some cases, the Hydra_service may automatically start, the user can ignore the error that it cannot start because it already running)
> mpiexec -register
domain-name\user-name
(Enter the domain-name\username from the previous step)
password
confirm password
> mpiexec -validate
SUCCESS
Set the same name for hard disks of the master and slave PCs. It is required that the hard disk drive of the master PC and the slave PCs be the same ( e.g C, E, D). For example, in the master PC, the MPI model is located in E drive, then all slave PCs must use the E drive.
Firewall requirements. It is recommended to disable the firewall for guest/public networks.
2. Configuration for Master Computer
Share the working directory (for example: "MPI_Model" is the folder containing the MPI model to be run, so the working directory in the master PC will be "E:\EFDC_Explorer Modeling System\Testing\EFDC\MPI_Model")
Share the installed folder of EEMS (contains EFDC+ MPI exe). For example, copy the EFDC+ MPI exe folder to the shared folder containing the model. Figure 1 show steps to share folders.
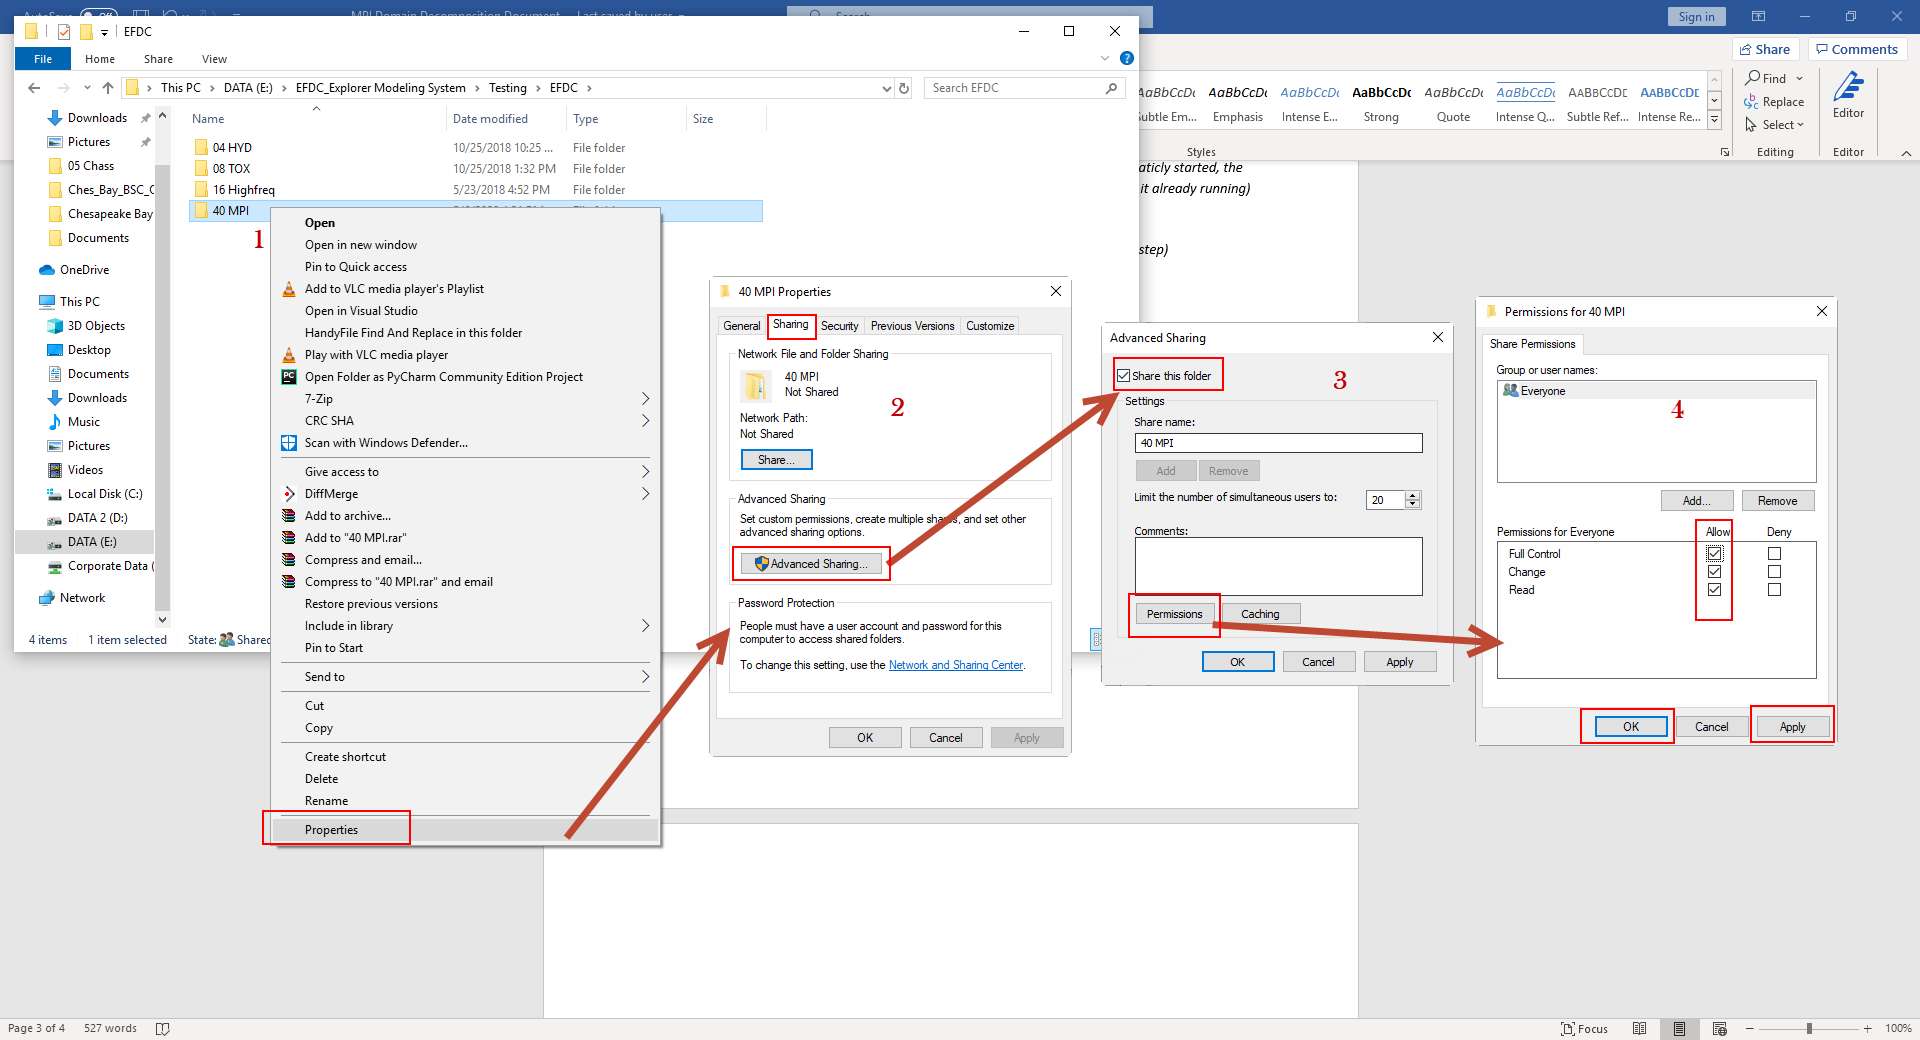
Figure 1 Share working directory from the Master PC (1).
3. Configuration for Slave Computers
On the master computer the folder "MPI_Model" is shared, to check whether the model folder ("MPI_Model") is shared or not, the user can paste the directory path (\\Master-Domain-name\shared folder name) to Windows Explorer on the slave computer (in this example it is "\\DSI-D03\MPI_Model"). If the folders are displayed the connection is established. Figure 2 shows that folders inside the shared folder "MPI_Model" on the slave computer can be seen.

Figure 2 Share working directory from the Master PC (2).
Create the same directory structure on the slave computer.
In this example the model folder on the master PC is "E:\EFDC_Explorer Modeling System\Testing\EFDC\MPI_Model" so the user should create a folder path as "E:\EFDC_Explorer Modeling System\Testing\EFDC\" on the slave computers. Note that there no need to create the folder name "MPI_Model", otherwise the next steps will have an error.
Open Command Prompt using the administrator permissions (see Figure 3) and use the following commands to link the shared folder between the master computer and the salve computers.
General case: Mklink /d "Working-Directory" "Shared-Directory"
In this example: mklink /d "E:\EFDC_Explorer Modeling System\Testing\EFDC\MPI_Model" "\\DSI-D03\MPI_Model"
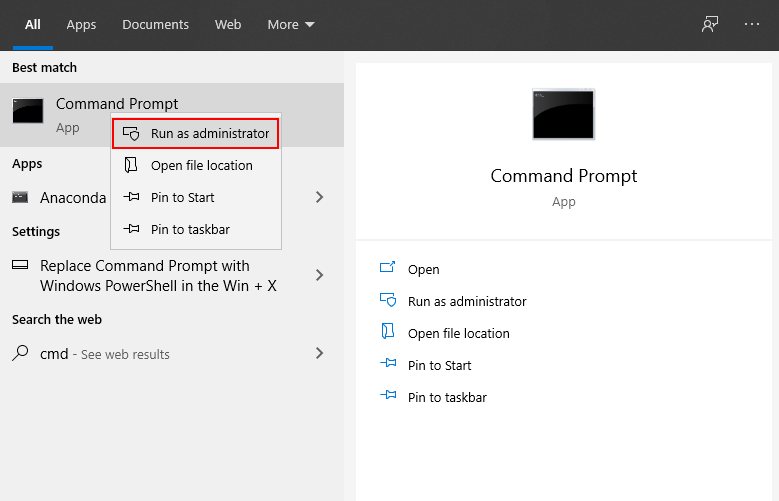
Figure 3 Run as Administrator for Command Prompt (1).
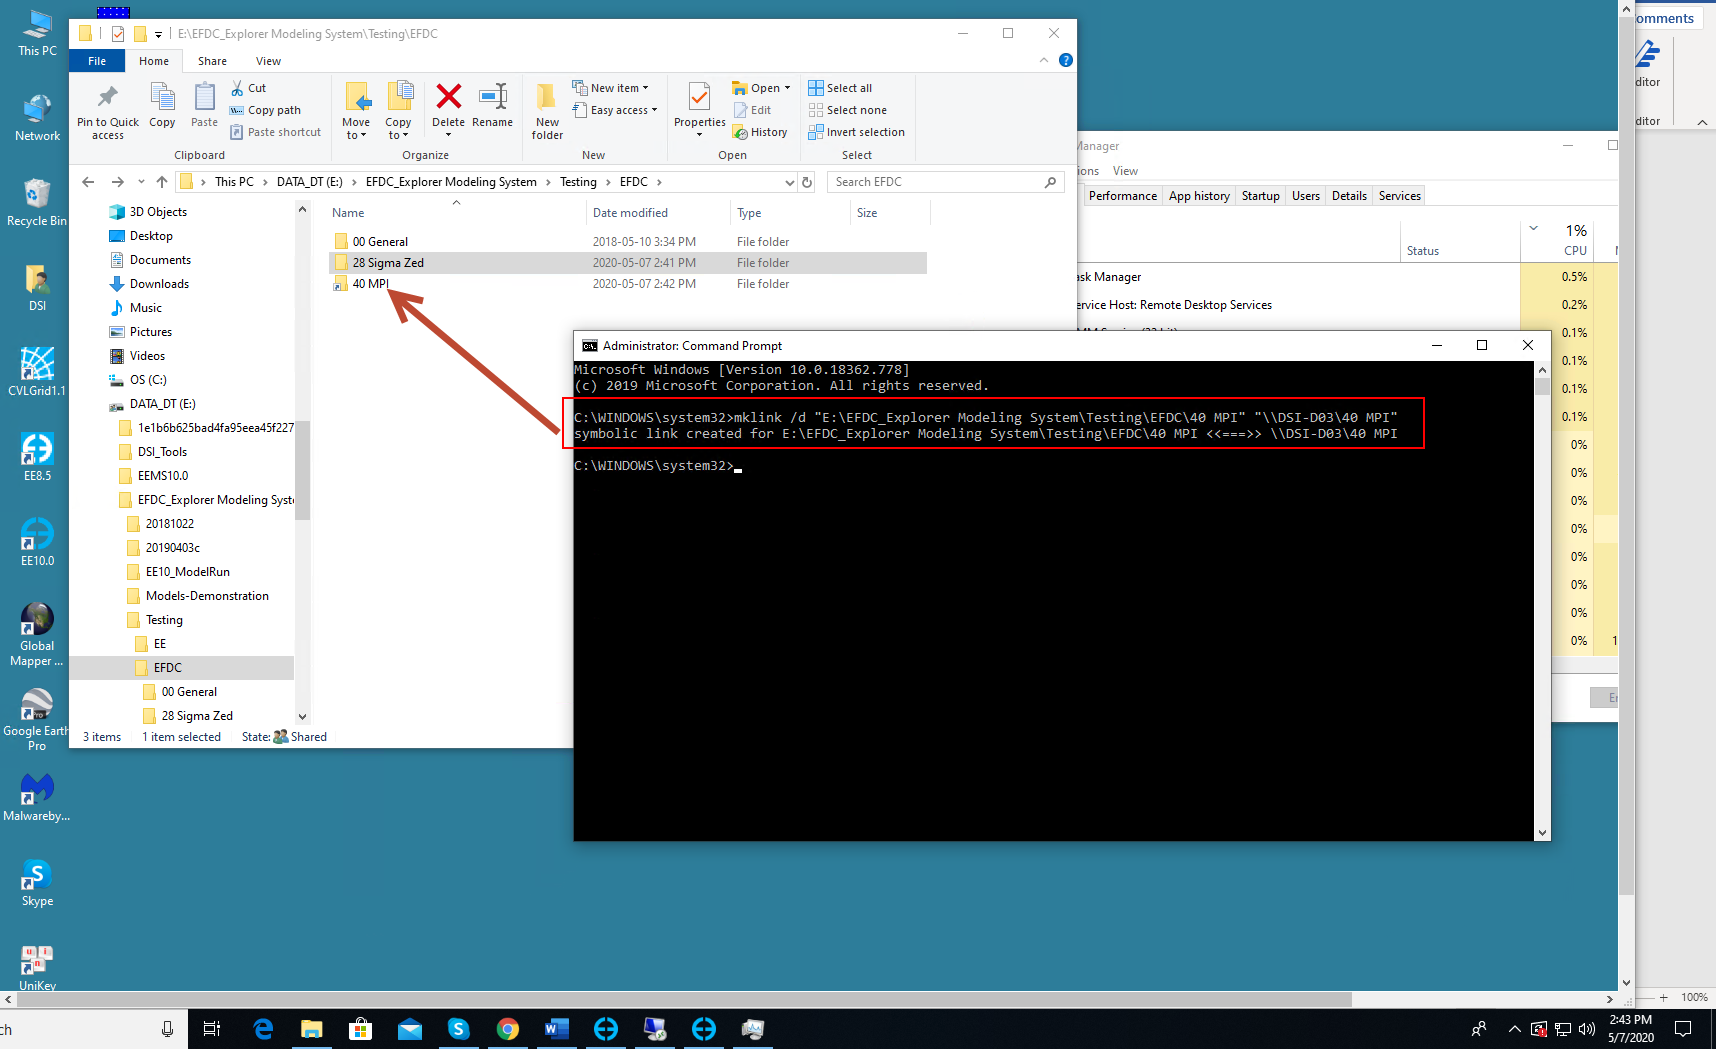
Figure 4 Run as Administrator for Command Prompt (2).
4. Steps to Configure EEMS to Run EFDC+ MPI
After setting up the cluster to run the model, running MPI on a cluster is the same for an MPI run on a single PC.
From EE main menu the click EFDC+ Run button and the EFDC+ Run Options form will be displayed. The tabs for General and MPI Cluster must be configured as described below.
General Tab
Ensure the MPI Domain Decomposition and Run MPI Cluster are checked
Define # OMP Cores Used (e.g. 2)
Define Total # Subdomains (e.g. 8)
Total Cores Used is updated automatically (# OMP Cores Used times Total # Subdomains)
Click on Run Automatic Domain Decomposition for EE to divide the model domain into the number of subdomains defined above.
Using the Domain Decomposition Option, the user can choose to divide the domain in the I or J direction
Select EFDC+ MPI executable file. Note that the user must browse to the executable file in the shared folder (this is mentioned in EFDC+ MPI)

Figure 5 EFDC+ Run Options: General tab.
5. MPI Cluster tab Settings
In the List of Computer Nodes table type computer names (including the master and slave PCs) in the Computer column. It is recommended to put name of the master PC on the first row and slave PCs in the following rows (see Figure 7). Another option is to put the IP address of the PCs. Figure 8 shows how to get IP address of the current PC.
In the Slots column, the user can manage the number of subdomains to be assigned to each computer. For example, this model has 8 MPI subdomains, in which two subdomains are assigned to run on the master computer, and six subdomains on the slave computer (see Figure 7).
Click on the Ping button on the Check column to verify that the connection is established between computers on the local network . Ping is the reaction time of your connection–how fast you get a response after you have sent out a request. A fast ping means a more responsive connection. It will show “Failed” if not connected.
Click Save button to save out the Host file (hostfile.txt). The Host file contains information on the configuration including the list of computer nodes (see Figure 9). Next time the user wants to rerun the model, the Host file can be used by clicking Load button.
Finally, click Run EFDC+ button to run the model. Figure 10 shows the EFDC+ MPI window running and show number of cores using in the master and slave computers
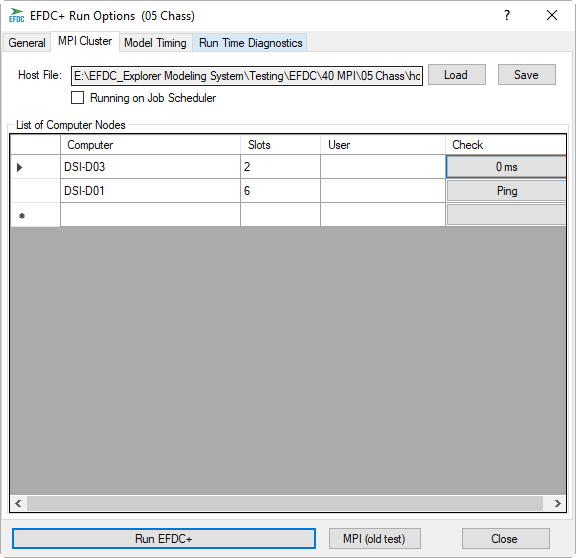
Figure 7 EFDC+ Run Options: MPI Cluster tab.
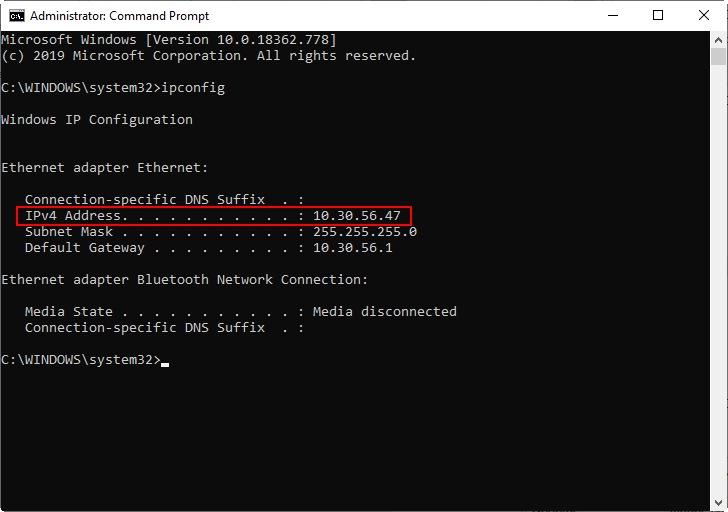
Figure 8 EFDC+ Run Options: MPI Cluster tab.
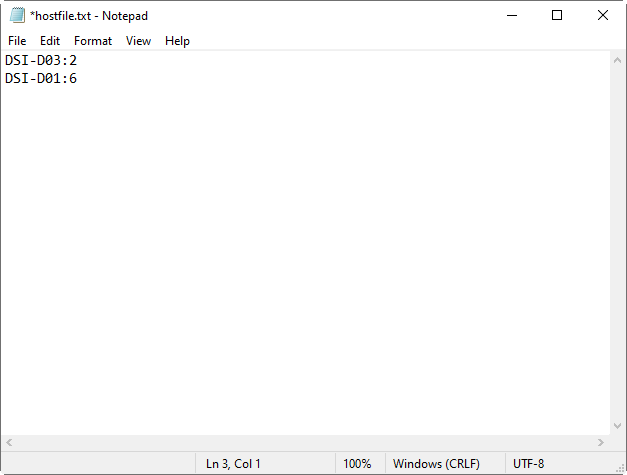
Figure 9 Example Host file.
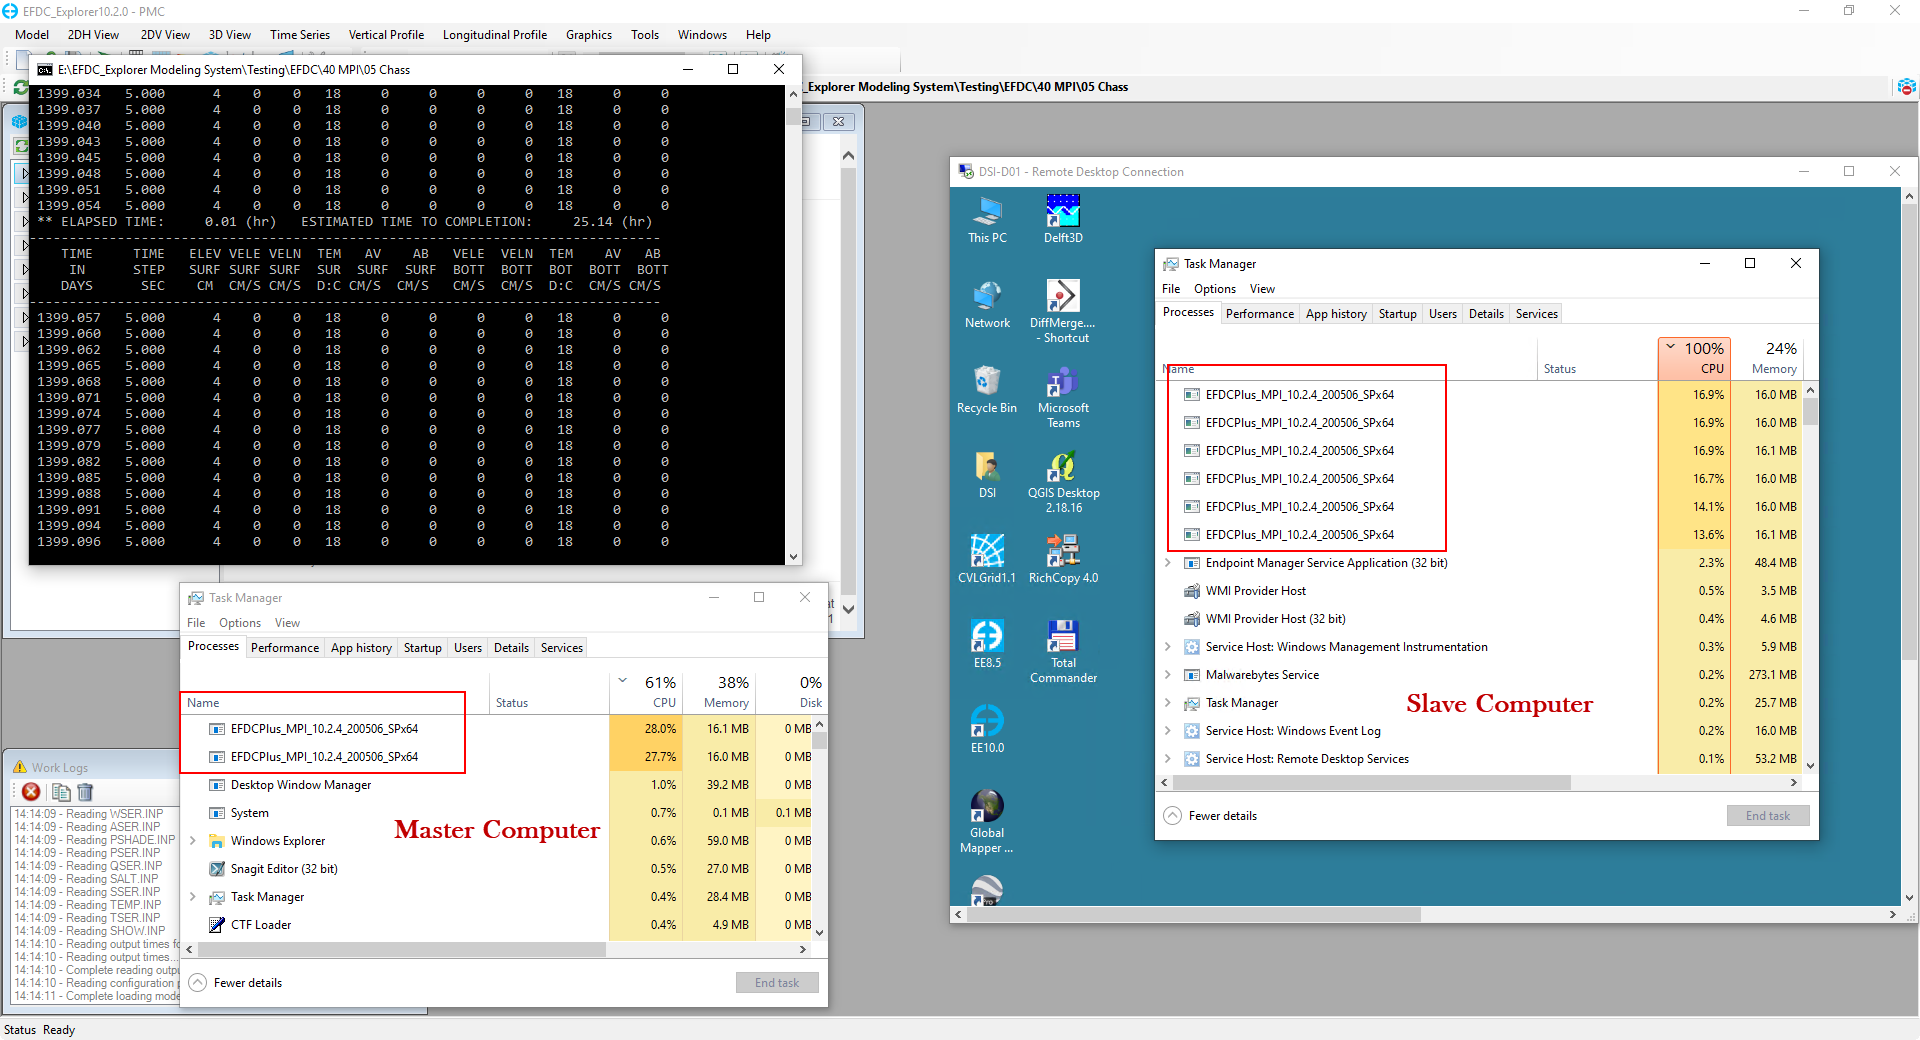
Figure 10 EFDC+ Running.