...
Figure 12. Choosing Premium resolution.
Using EE
...
, CVLGrid and Global Mapper
| Info |
|---|
Note that users can generate a geo-reference map in both EFDC_Explorer (EE) and CVLGid. The process for generating the map is the same in both tools. |
...
Figure 24. Geo-reference file loaded.
Option 3: Using Global Mapper
Global Mapper® is a GIS software of Blue Marble Geographics® software company. The geo-referenced map generated from this tool can be opened in EEMS as an offline background map in the 2DH View. This section will describe how to generate the geo-referenced map from the Global Mapper.
- From the model loaded in EE, we export model grid outline in shapefile format. This shapefile will define the region of the map in Global Mapper.
- Open Global Mapper, then click Open Your Own Data Files (Figure 25)
- Browse to the shapefile to open it (Figure 26 and 27)
- Click Online Download Data button, then in the IMAGERY, select World Imagery then click OK button (Figure 28 and 29)
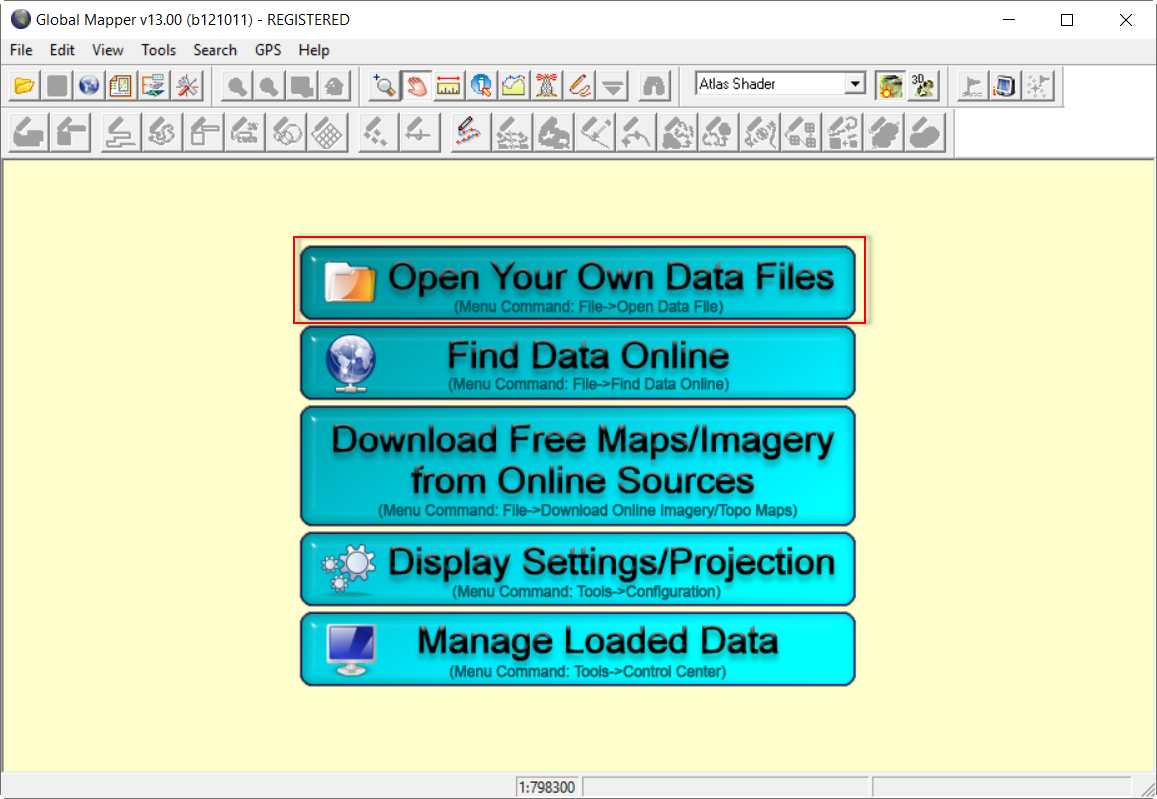
Figure 25. Open Global Mapper.
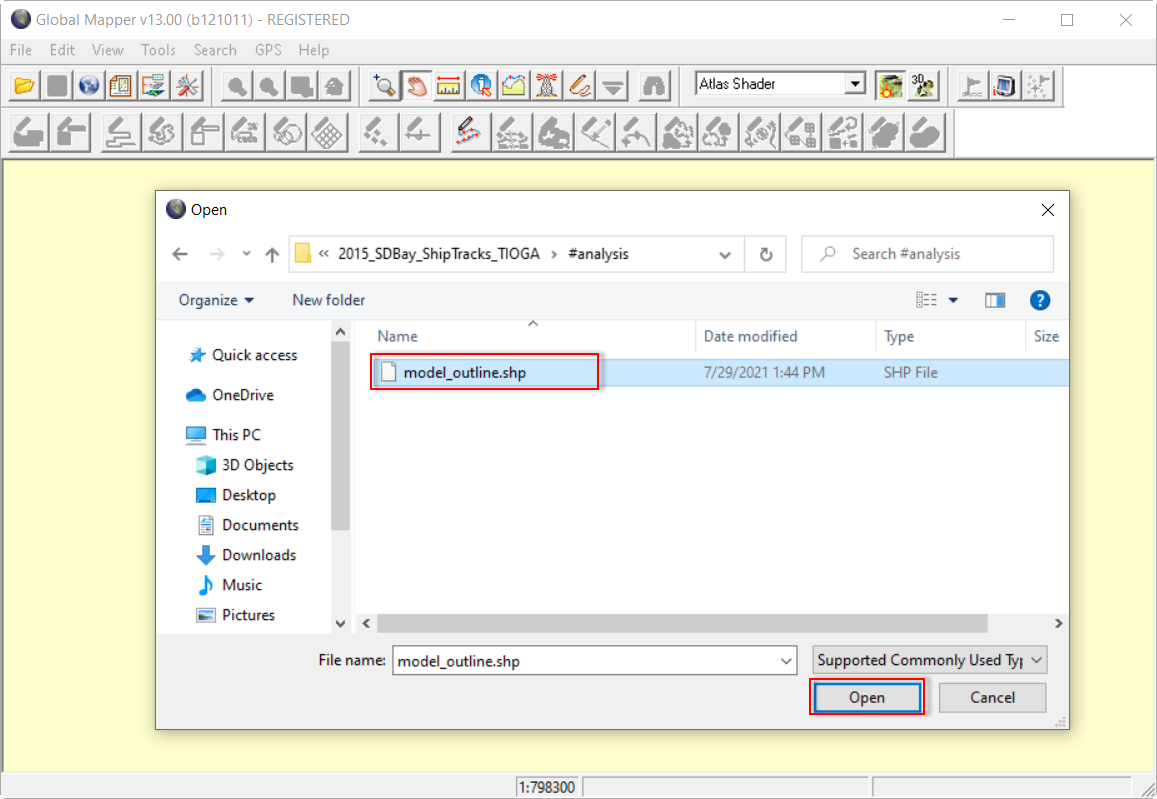
Figure 26. Open Model Outline (shapefile).
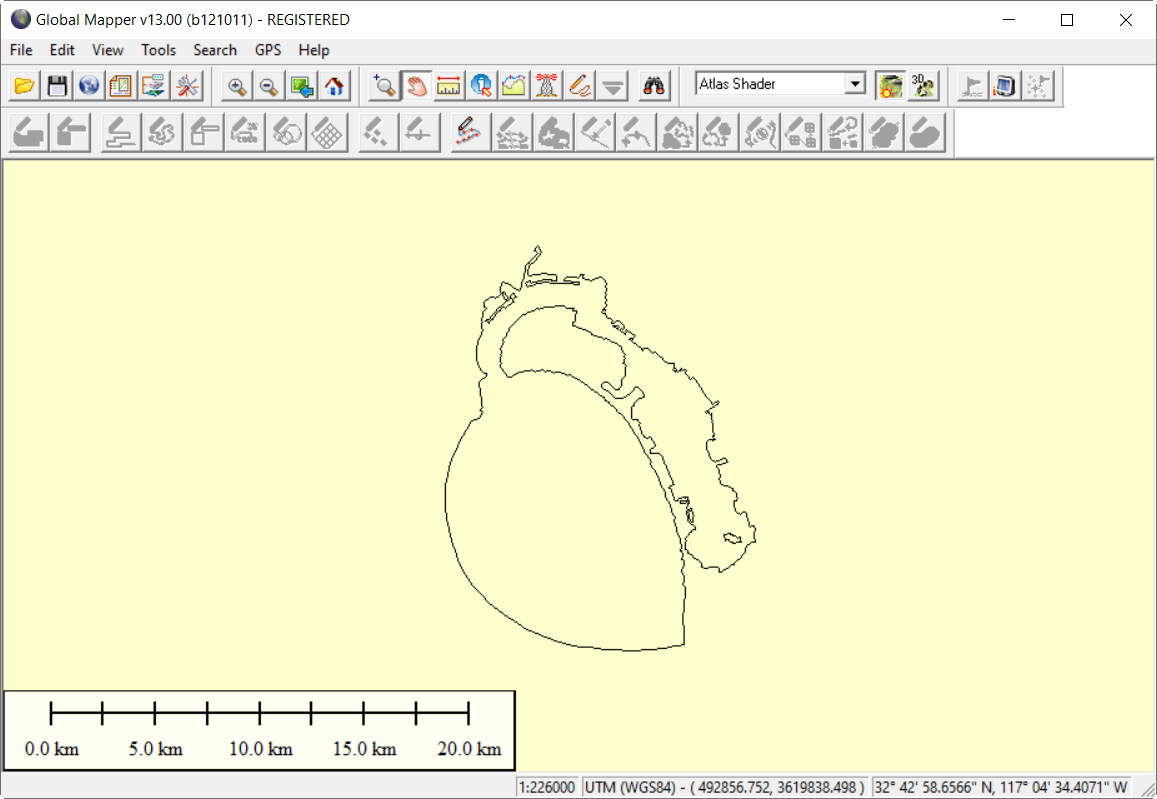
Figure 27. Model Outline (shapefile) Loaded.
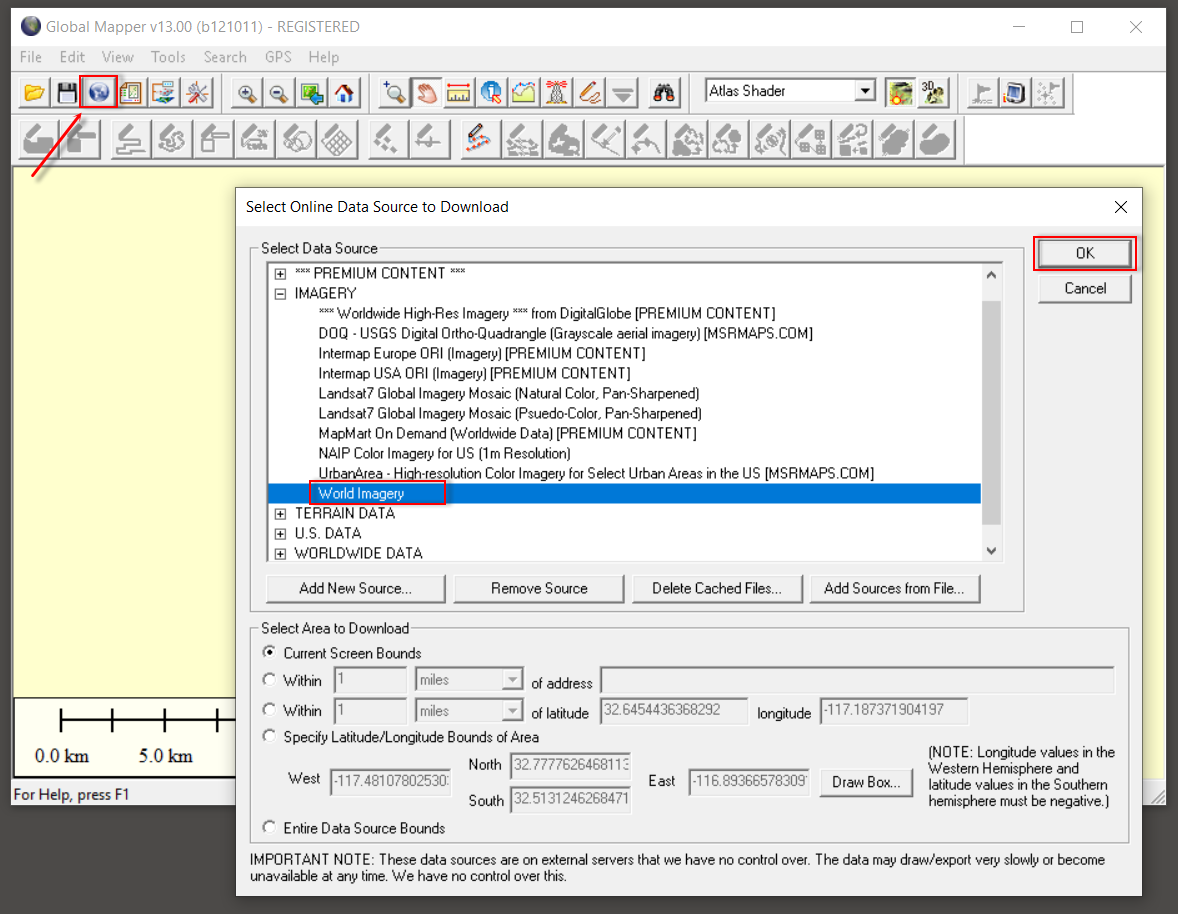
Figure 28. Open Online World Imagery Map (1).
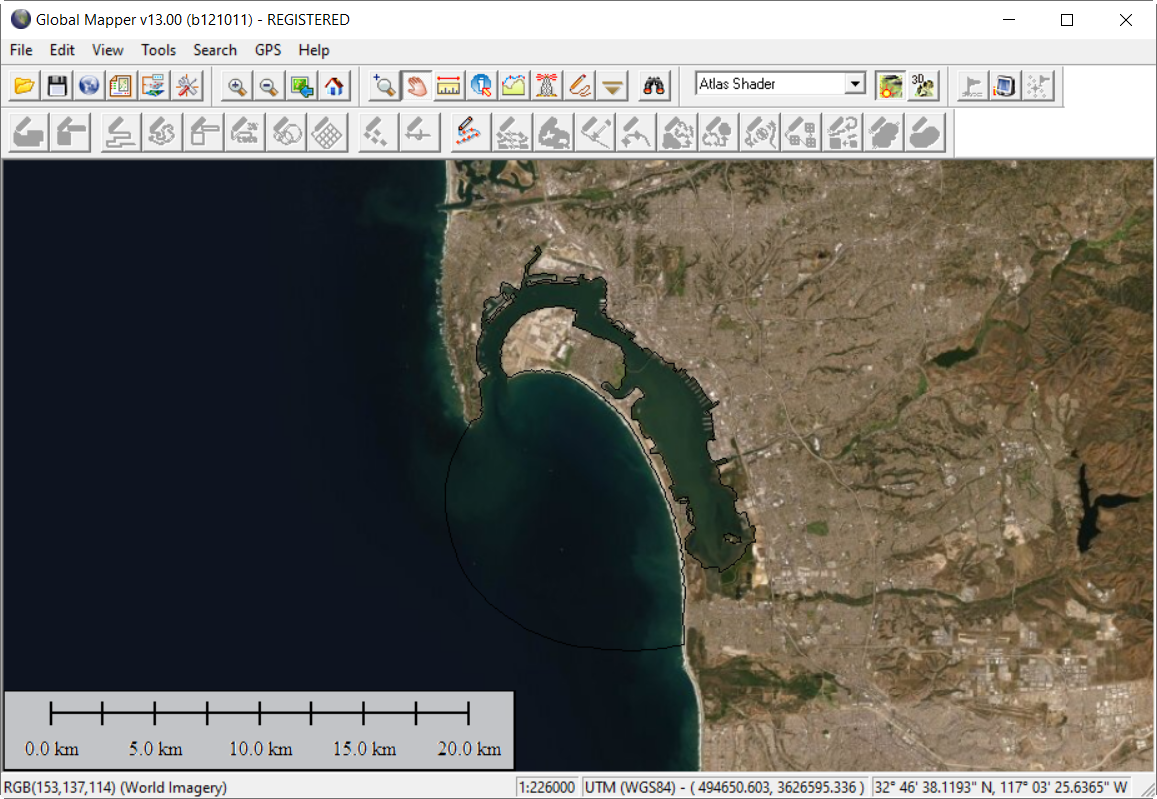
Figure 29. Open Online World Imagery Map (2).
- Click on the Open Control Center, the Overlay Control Center form will be shown, uncheck on model_outline.shp layer then click Close button (Figure 30)
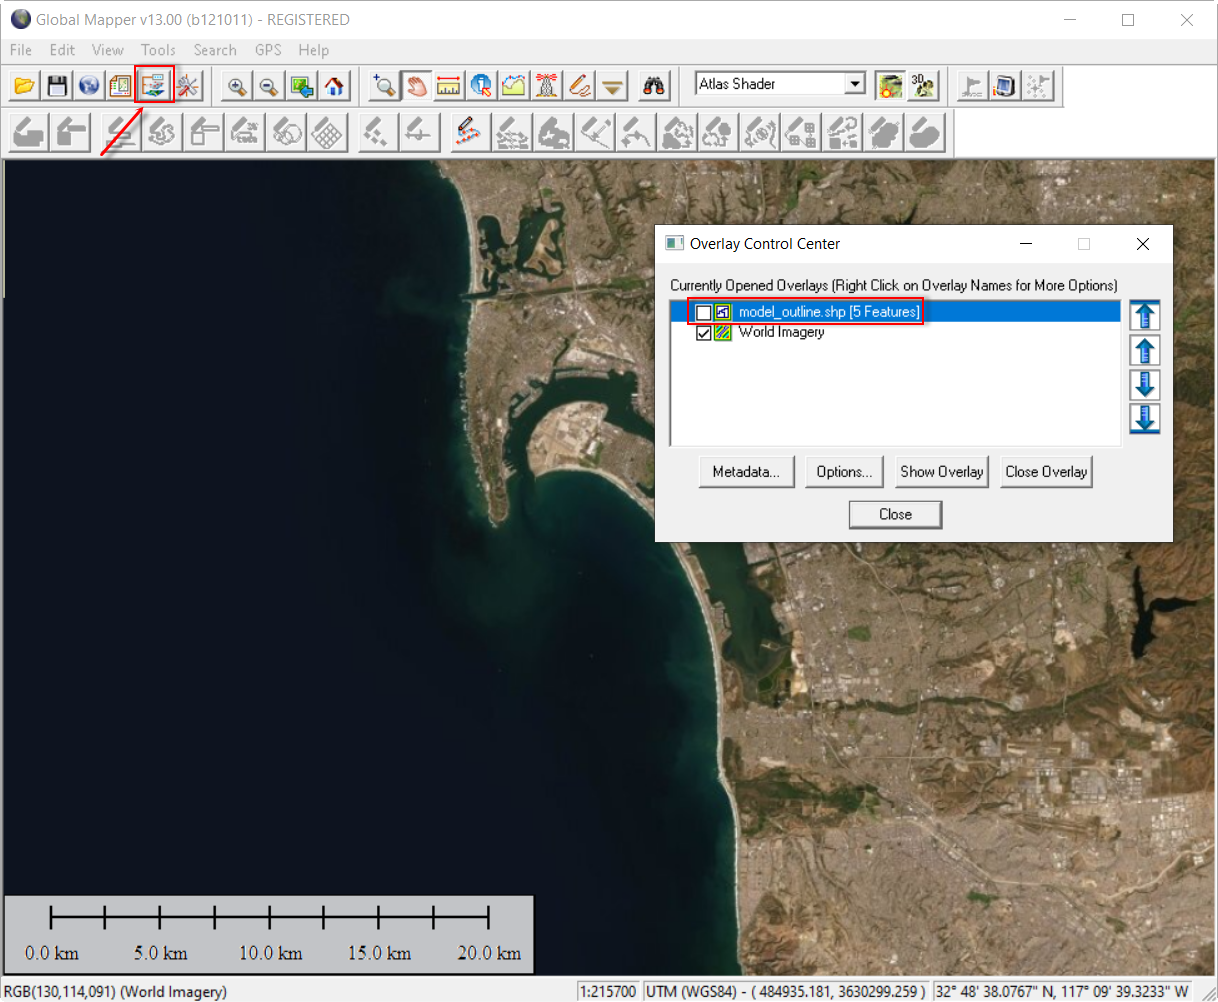
Figure 30. Show off the shapefile layer.
- Click File menu, then select Export Raster/Image Format (Figure 30)
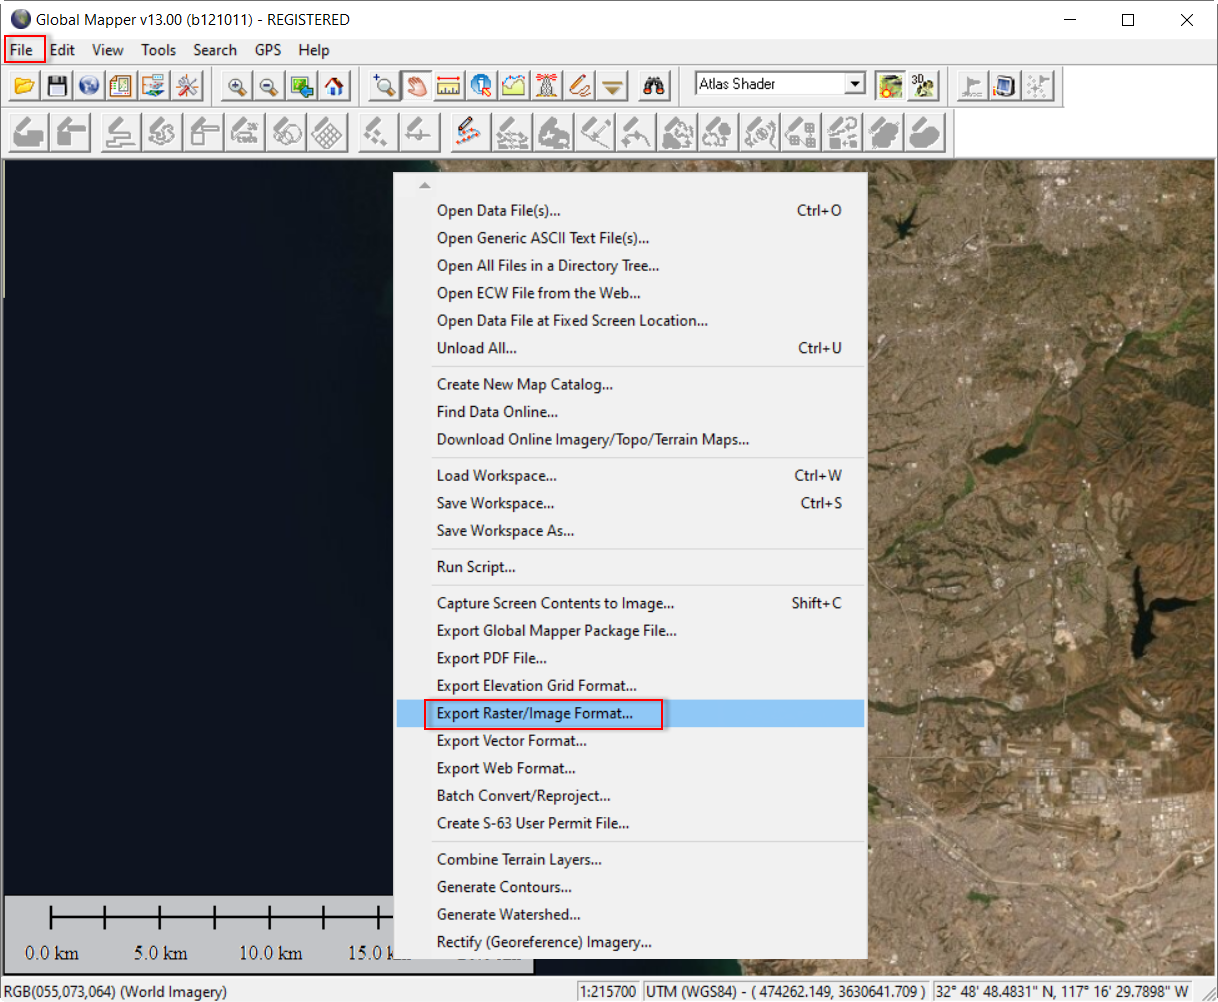
Figure 30. Export Raster/Image Format.
- Select JPG format then click OK button (Figure 31)
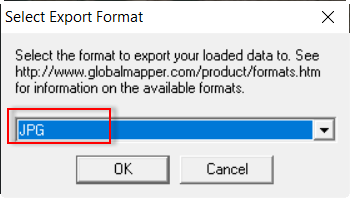
Figure 31. Export Raster/Image Format.
- From the JPG Export Options form, in the General tab, we define to enter values for X-axis and Y-axis of the Sampling Spacing. The values entered here will define the resolution of the JPG file, the smaller values the higher resolution. Next, check on Generate World File option. Selecting this option will generate a *.jgw file accompany with *.jpg file (Figure 32).
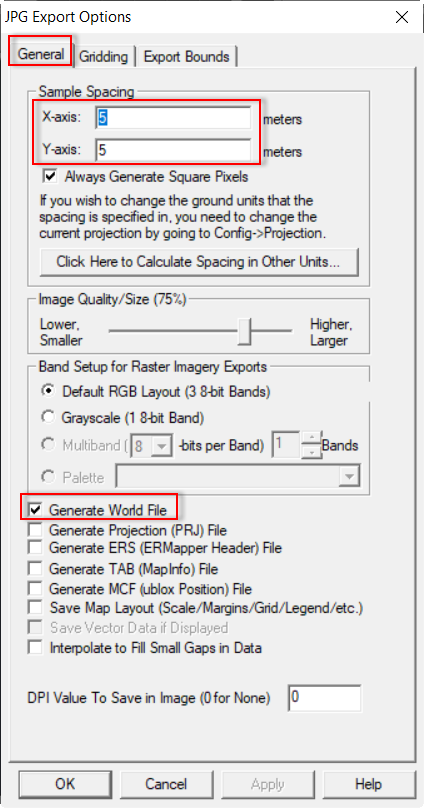
Figure 32. Define Resolution of Exporting Image (General tab).
- Next, in the Export Bounds tab, click on Draw a Box button to define image area to export (Figure 33). We start drawing a rectangle (yellow highlighted) then click OK button (Figure 34). Then click OK button in the JPG Export Options form.
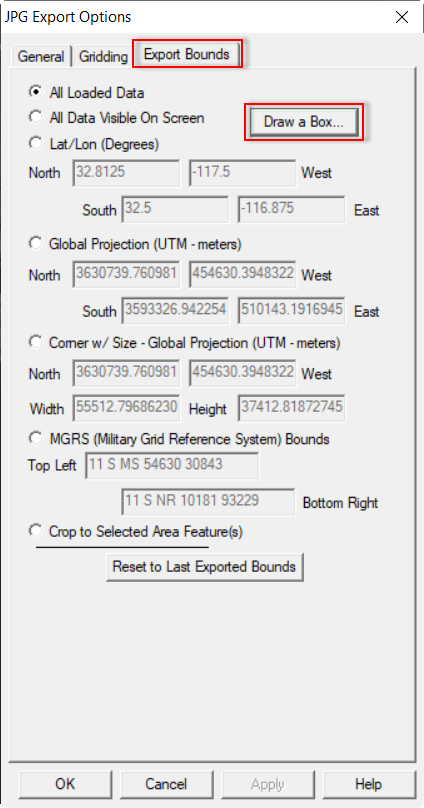
Figure 33. Define Exporting Bounds.
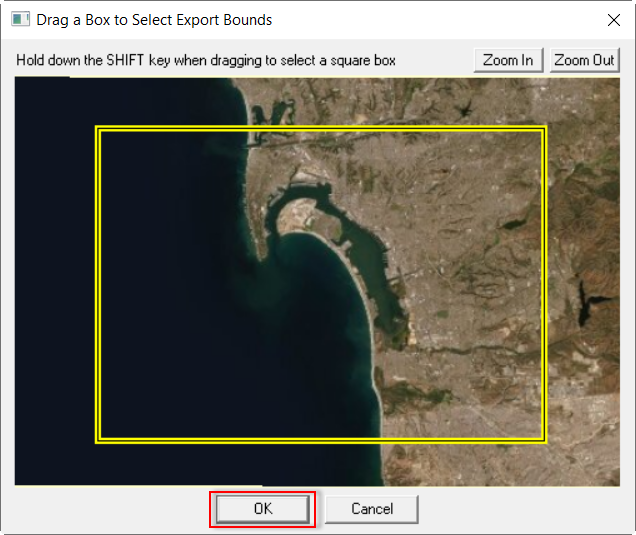
Figure 34. Drawing an Image Area to Export.
- The Save As form will be displayed, we define the folder which the image will be exported to and enter a file name then click Save button (Figure 35).
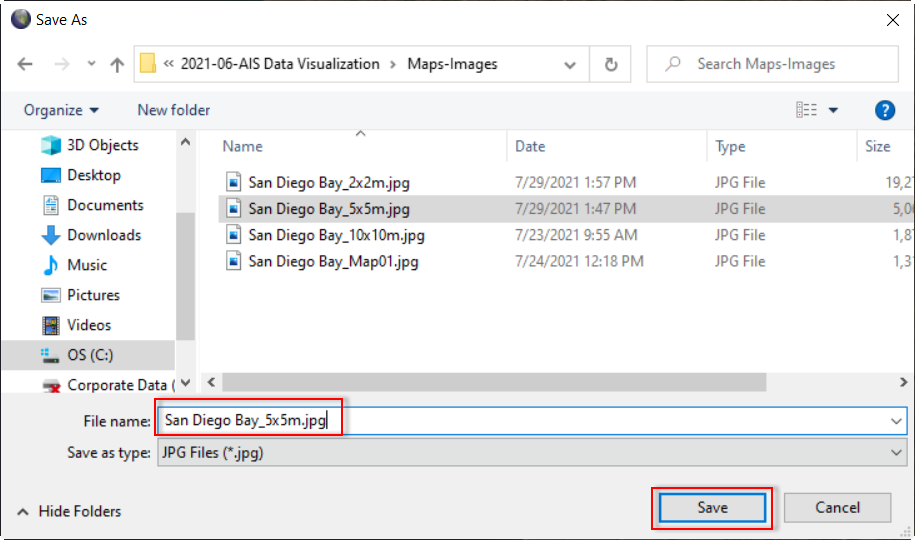
Figure 35. Enter a Filename to Export.
- After the exporting process completed, we can see that there are two types of files in the folder (*.jpw and *.jpg) as shown in Figure 36.

Figure 36. Image Exported Complete.
- The exported image can be opened in the 2DH View of the EE as shown in Figure 36 and 37.
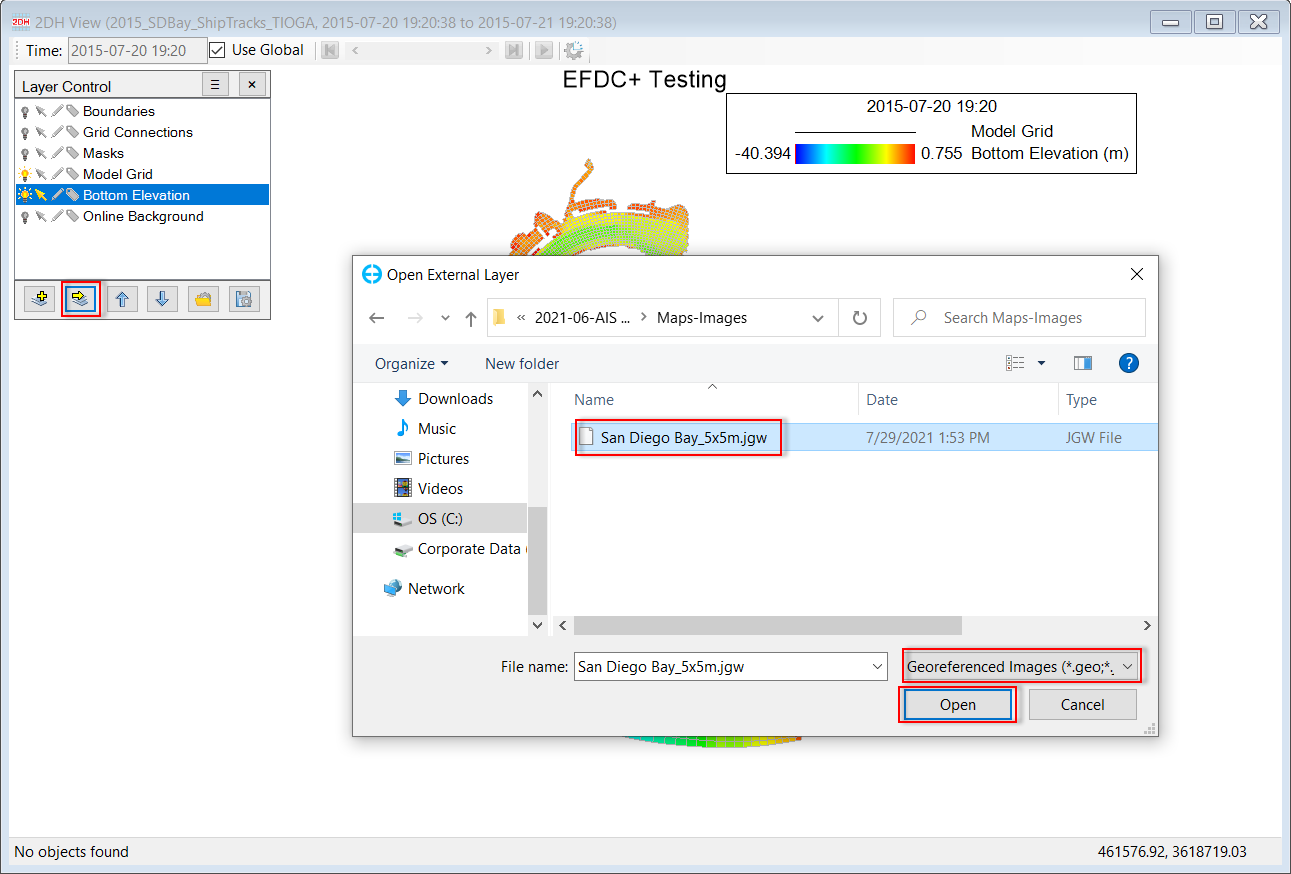
Figure 36. Open the Exported Image in the 2DH View of the EE.
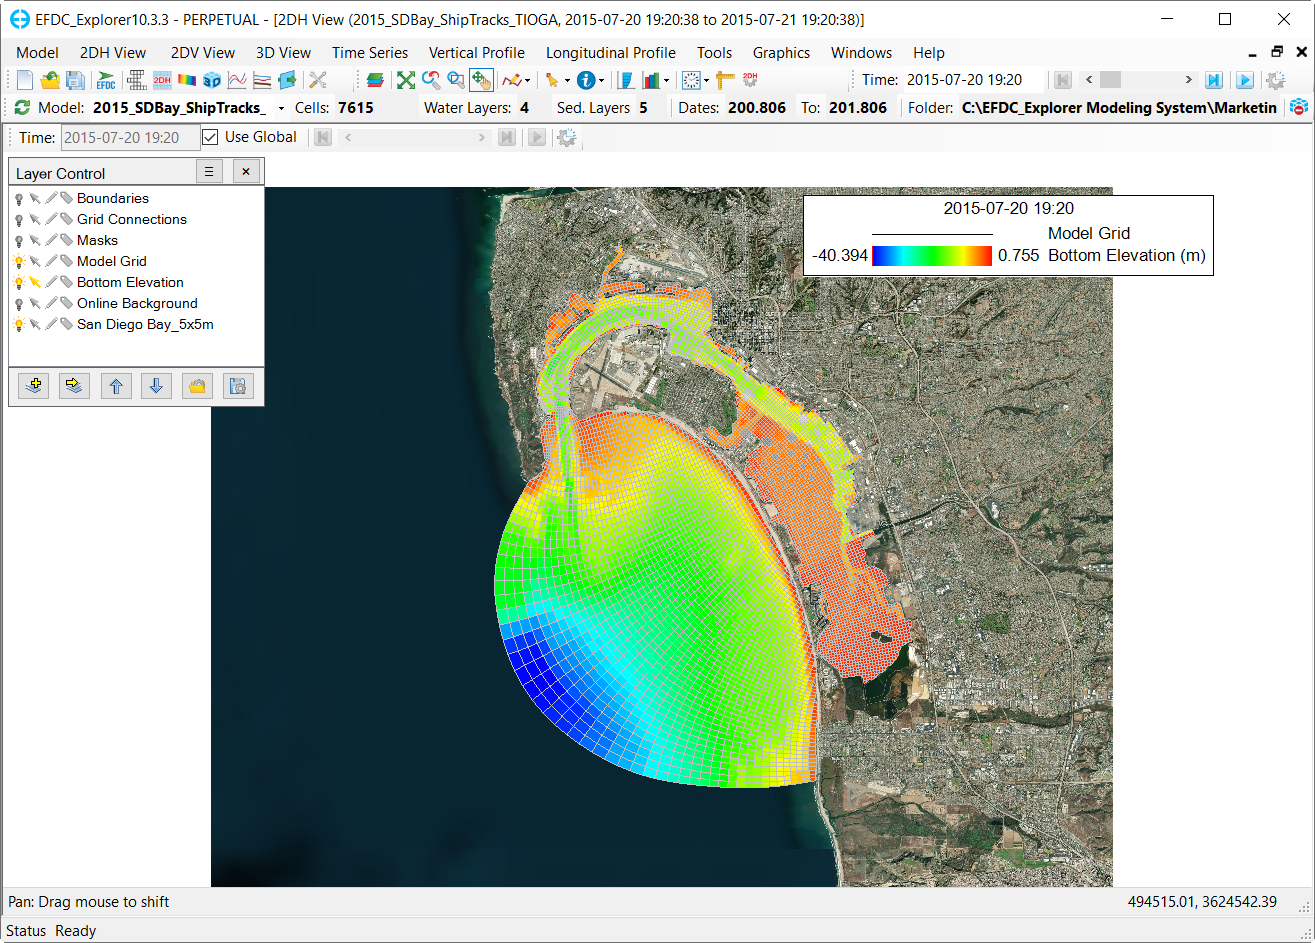
Figure 37. Offline Geo-referenced Map Loaded in the 2DH View of the EE.