Grid+ uses several files types to develop a grid for use in EFDC. The .gpp file is a Grid+ project file and saves all the different files the user has loaded, including the actual grid (.gpp), background maps (.JGW, .GEO), splines (.P2D). In addition, if the user has any overlays (e.g. shoreline files) or DTM (e.g. bathymetry XYZ data), the full path name is saved in the gpp file, so those annotation layers will be added to the display when the gpp file is opened.
Loading a Project File
To load a Grid+ project file (*.gpp), the user should click File menu then select Open Project (or use shortcut keys Ctrl+O), as shown in 2225143815. The user should browse the Grid+ project file and then click the Open button, as shown in 2225143815. After clicking Open button, the Grid+ will load all files, such as the actual grid (.gpc, .cvl), as shown in 2225143815.
Another option is that the user can load the Grid+ project file by selecting the project file in the Window Explorer folder (LMC) then drag and drop the file into the workspace of CVLGrid.native grid file with the extension *.gpc. Besides this, it can also load various other types of grids, such as *.cvl (grid file made by CVLGrid) and *.grd (grid file made by Delft3D). To load a grid file, click the Import file button from the main toolbar, then select Import Grid, as shown in 2224882112. A native Grid+ @.gpc file can also be dragged and dropped onto the layer menu on the left of the form.
| Anchor | ||||
|---|---|---|---|---|
|
...
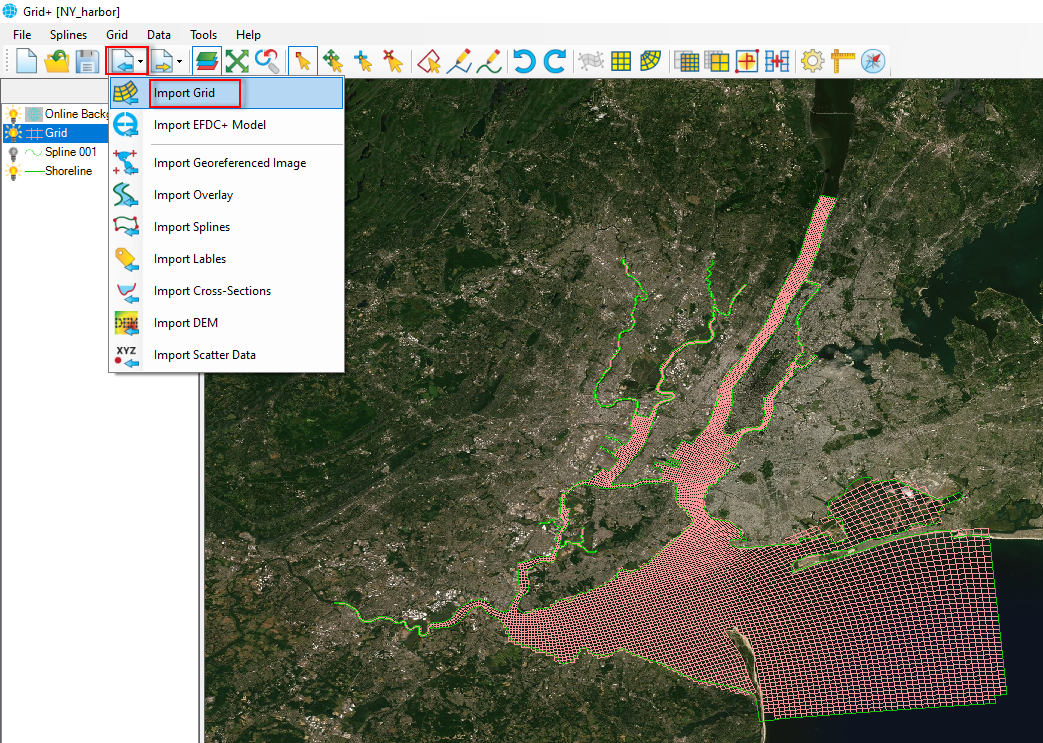
Figure 1 Load . Importing a CVLGrid project grid file.

Figure 2 Browse to a project file.

Figure 3 A project file loaded into CVLGrid.
Loading a Grid File
To load just the CVLGrid grid file (*.CVL), the user should click the Import button on the Layer Control form. if the Layer Control does not appear in the workspace of CVLGrid, the user should select the check box for Layer Control on the right side as shown in Figure 1. After clicking the Import button, the user should browse to the CVLGrid file then click the Open button as shown in Figure 2. After clicking the Open button CVLGrid will load just the grid file as shown in Figure 3.
Another option is that the user can When selecting the Import Grid option, the Import Grid form will pop up, as shown in 2224882112. We browse to the grid file. We can select many types of grids by clicking on the down arrow in the form. After selecting a grid file, click the Open button to load the file. After clicking the Open button, then the Coordinate System form will be displayed, as shown in 2224882112. It is necessary to define the correct coordinate system for the grid. Select either the Geographic system or UTM system, then click the OK button. If the wrong coordinate system is selected, the grid will be located in the incorrect location. It is then necessary to load the grid again and save it with another coordinate system.
| Anchor | ||||
|---|---|---|---|---|
|
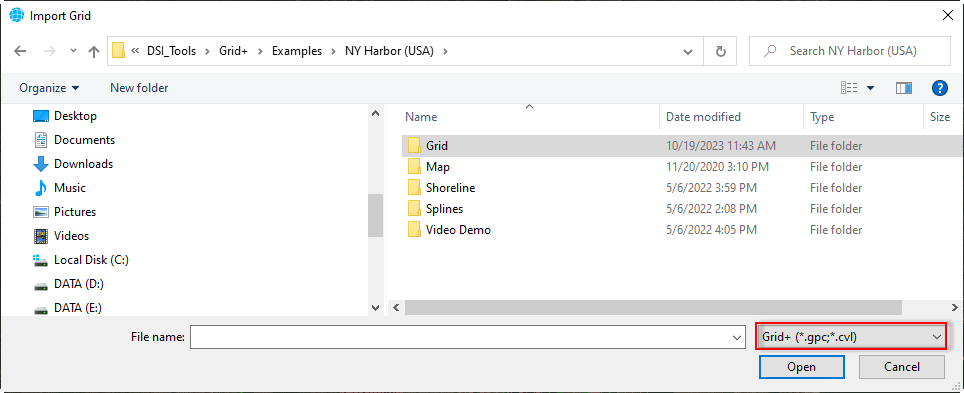
Figure 2. Browsing to a gird file.
| Anchor | ||||
|---|---|---|---|---|
|
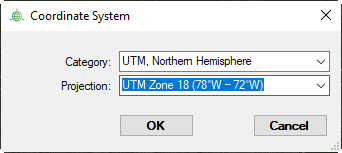
Figure 3. Defining the Coordinate System.
Another option is tp load the grid file by selecting the grid file (LMC) and then drag - and - drop the file into the workspace of CVLGridGrid+.
| Anchor | ||
|---|---|---|
|

Figure 2 Browse to grid file form.

Figure 3
|
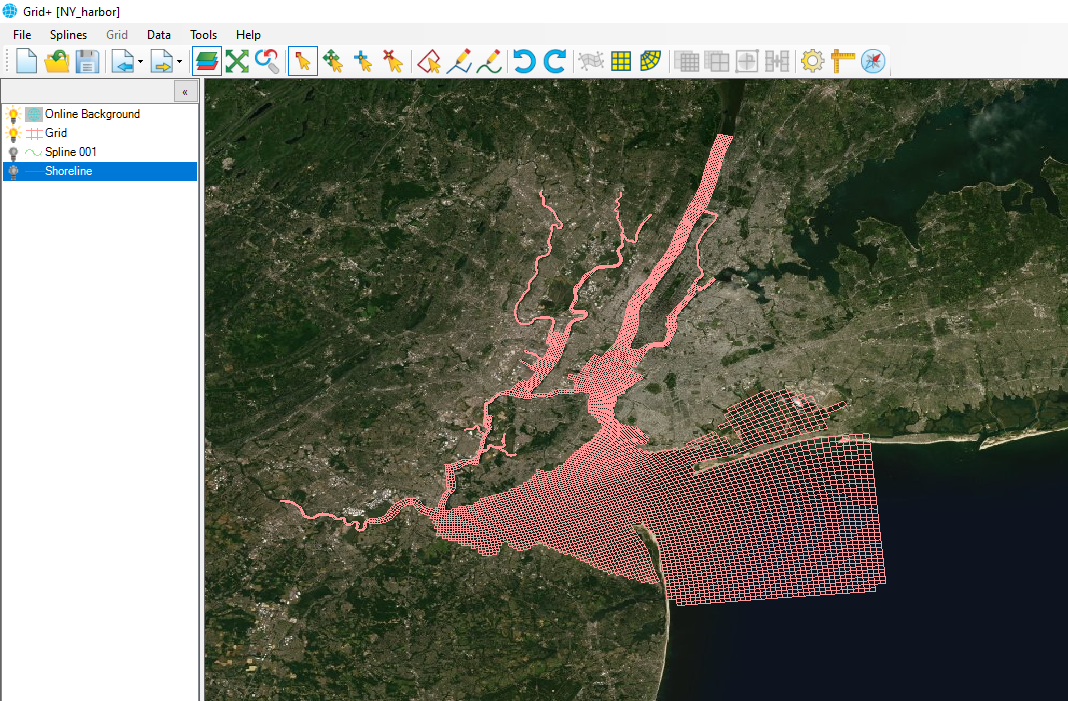
Figure 4. A grid file loaded into CVLGridGrid+.
Related articles
| Filter by label (Content by label) | ||||||||||||||||||
|---|---|---|---|---|---|---|---|---|---|---|---|---|---|---|---|---|---|---|
|
...