The user can set the primary computational option for enabling the vegetation feature Use vegetation resistance and Use vegetation with diagnostics from the drop-down menu as shown in Figure 1.
Anchor Figure 1 Figure 1
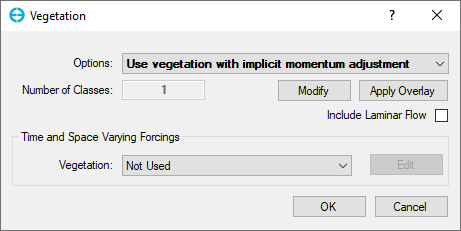
Figure 1. Hydrodynamic Options: Vegetation.
...
There are three vegetation options available in EE as shown in Figure 2 243957772.
- Do not use vegetation
- Use vegetation with implicit momentum adjustment: implement vegetation resistance
- Use vegetation with explicit momentum sink: implement with diagnostics to file CBOT.LOG
...
In this example, set vegetation class 1 to zone 1, class 2 to zone 2, class 3 to zone 3, and class 4 to zone 4. So select the Only grid cells inside polygons option, next select class 1 in the Values to Set frame, next, in the Polygon Files frame, click Add File button to browse to the polygon file which defines zone 1 ( e.g Zone 1.p2d) as shown in Figure 5. Then click Apply Defined Conditions button to proceed with the vegetation assignment process. A message will pop up when it is complete. Then click OK button. Taking similar steps as doing for zone 1 to other zones. Once the vegetation assignment is complete, from the Layer Control, click the Add button to add the vegetation class to the 2DH View as shown in Figure 6 and vegetation map is shown in Figure 7.
...
For a model domain that needs to assign many vegetation types (e.g., hundreds), using each polygon file (*.p2d) to assign vegetation to each zone, as described above, will take time. An ideal solution for this case is using the shapefile (*.shp), which contains many polygons.Note that EE will refer to them to name . Alternatively, a P2D file can be used with multiple polygons. In this case, the Description must match the ID in the shape file or in the P2D. EE will refer to the Description in the Vegetation Classes Options form (Z1, Z2, etc) (See Figure 8) to assign vegetation classes . Click as shown in Figure 8. Click Apply Overlay button, then the Apply Cells Properties: Vegetation form will appear.
(1) Select Only grid cells inside polygons option, the user does not care about the Values to Set frame
...
Right after clicking the Open button in the (4) step, Shapefiles Attributes form will appear as shown in Figure 10, The fields (columns) of the shapefile will be shown in the Data set Preview, the Name column has been named the same as names in the Description row in Figure 8, so the user needs to select Name for ID's Field as shown in Figure 10 then click OK button. It comes back to the Figure 11 form. Click Apply Define Conditions button to proceed with the vegetation assignment. As a result, vegetation assignment using a shapefile is shown in Figure 12.
...