...
The user clicks Generate 3D Geo/DEM button, 3D Geo/DEM OptionsGeneration form will appear, the user select Generate 3D Georeference option, then browse to Geo File, next browse to Terrain File. After browsing to Geo File, the information of original image size will be displayed. Once the user can change the resolution of the Geo image by putting percentage (1 to 100) in Resize Image (%) box. Besides, the user can select Cell Size, Interpolation Radius optionally as shown in Figure 9. Finally the user click Generate button. Once, a form for importing raw data of terrain data file appear as shown in Figure 10. The user click Import button to proceed the process.
...
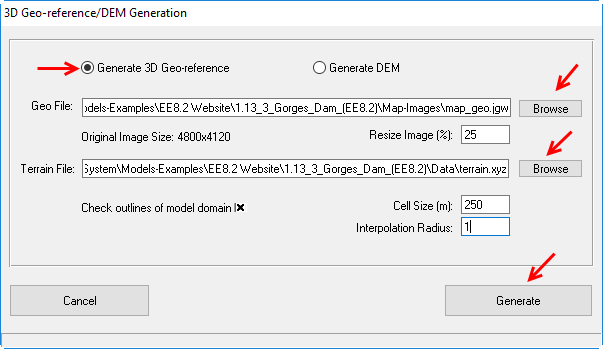 Figure 9 3D Geo-reference/DEM Generation form .(1)
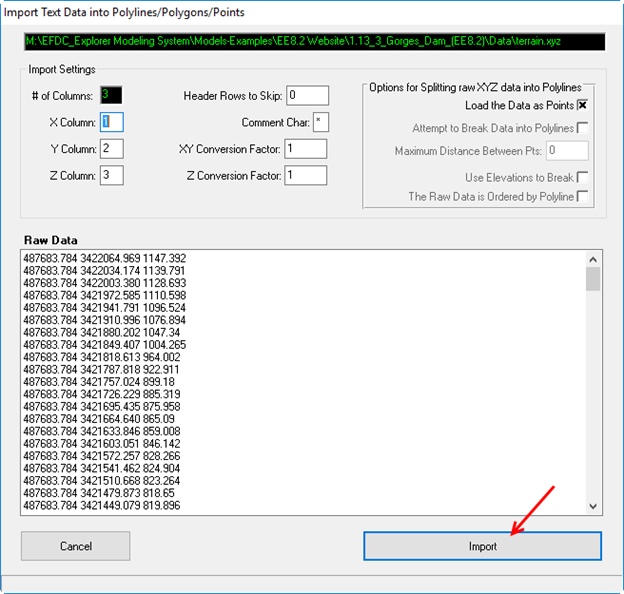 Figure 10 3D Geo-reference/DEM Generation Import Terrain Raw Data form.
After the process of Importing terrain data file completed, a Save 3D Geo-reference File form appear, the user should name the file and select folder directory to put the file, then click Save button as shown in Figure 11. The process to generate 3D Geo-reference file done.
...
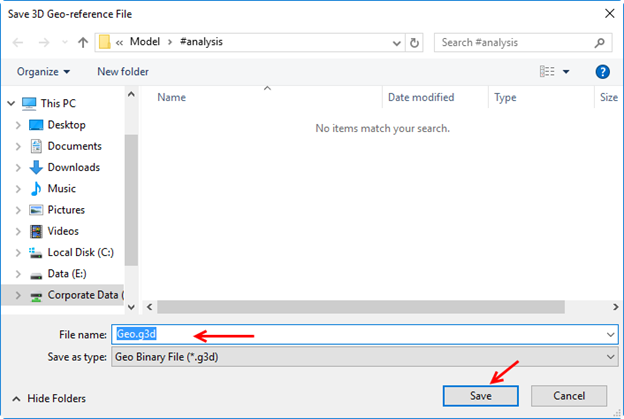 Figure 11 Save 3D Geo-reference File form.
2. Generate DEM file
In 3D Geo/DEM Options form, the user select Generate DEM option, then browse to Terrain File. Once the user can change the Cell Size, Interpolation Radius optionally as shown in Figure 12. Finally the user click Generate button. Similarly to generate 3D Geo-reference file, a form for importing raw data of terrain data file appear as shown in Figure 10. The user click Import button to proceed the process.
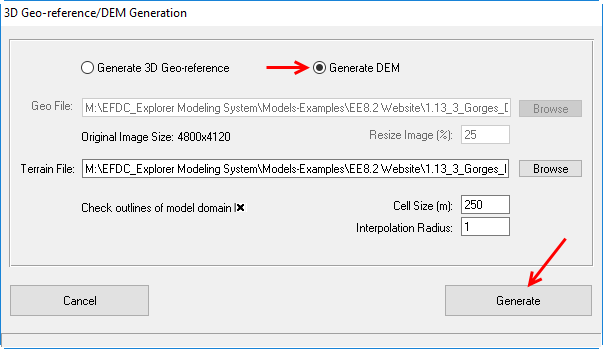
Figure 12 3D Geo-reference/DEM Generation form (2).
After the process of Importing terrain data file completed, a Save DEM File form appear, the user should name the file and select folder directory to put the file, then click Save button as shown in Figure 13. The process to generate DEM file completed.
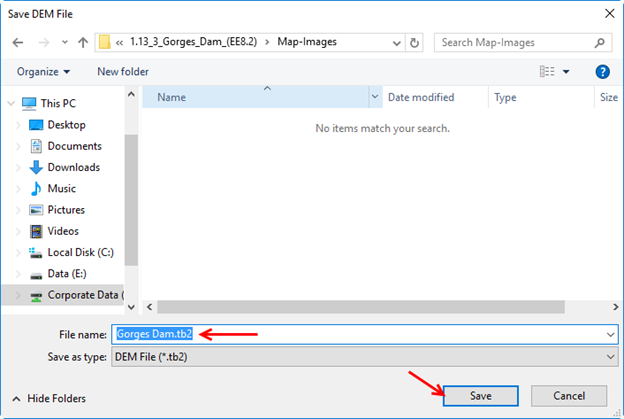
Figure 13 Save DEM File form.
3. Load 3D Geo/DEM file
When the 3D Geo-reference file or DEM file are available, the user now can load them. To load these files, the user browse to 3D Geo-reference file (*.g3d) or DEM file (*.tb2), then check on Show 3D Geo/DEM box as shown in Figure 14. Figure 15 shows a 3D Geo-reference file loaded. When the file 3D DEM loaded, in DEM Color Ramp, the user can choose either Auto Ramp or Fixed for displaying. Figure 16 shows a 3D DEM file loaded with fixed color ramp and Figure 17 shows a 3D DEM file loaded with auto color ramp.

Figure 14 Load Geo/DEM File form.
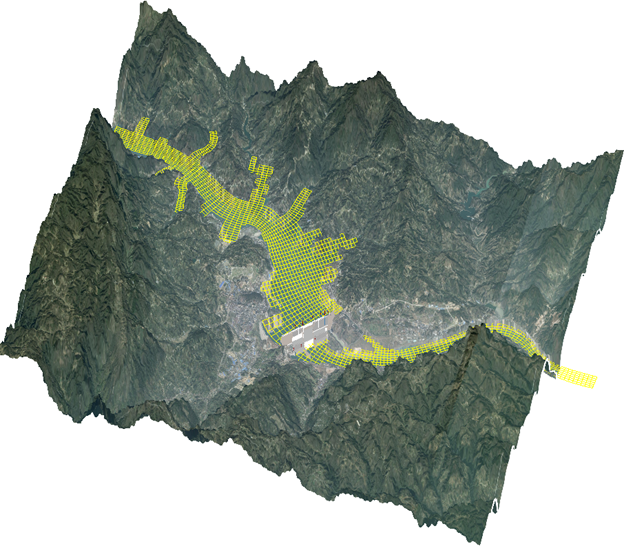
Figure 15 A 3D Geo-reference file loaded.
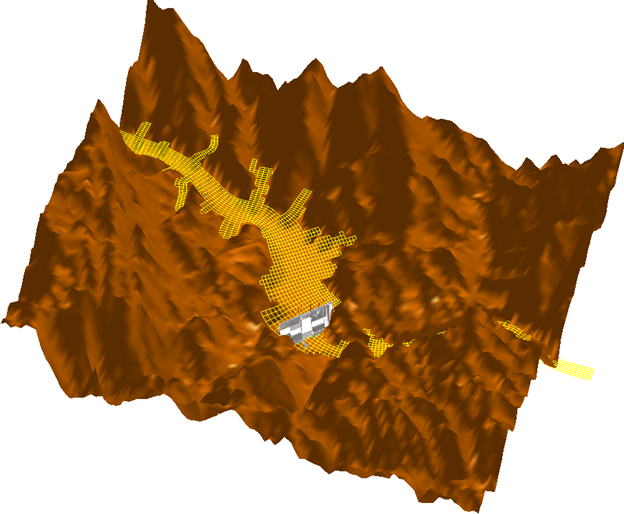
Figure 16 A 3D DEM file loaded with fixed color ramp.
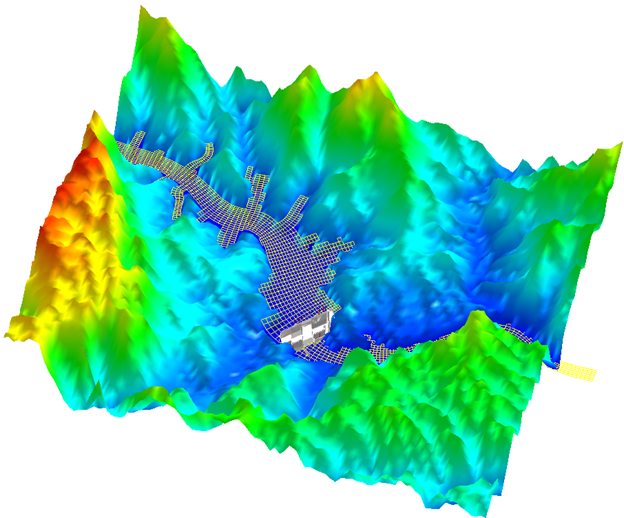
Figure 17 A 3D DEM file loaded with auto color ramp.