Importing Multiple Grids into EFDC+ Explorer
EFDC+ Explorer allows the option of importing multiple grids and joining them together within the Grid Generator module.
While it is possible to join the separate domains using external grid generators one by one, this only works if they are all in the same I, J domain. For example, if users have several domains they must first load one domain then paste this and add more one at a time. In the end, users will have only one grid which they can then import into EE.
If all the grid subdomains are not in the same I, J domain then the sub-domains will have to be brought in separately. This must be done manually by the user. However, EE helps with this process by allowing the user to set the N-S or E-W connection. Once the model is saved EE will generate a MAPPGNS.INP or MAPPGEW.INP file or both of them depending on which type of connectors established.
In this example grid files titled Part01.cvl and Part02.cvl are used to demonstrate the necessary steps as shown below:
- Open EE10
- From the EE10 interface, there are several options to start a new model: use the Model menu item in the main menu, and select New Model; select the New Model
 button from the button the toolbars; or press Ctrl+O from keyboard) as shown in Figure 1 and Figure 2.
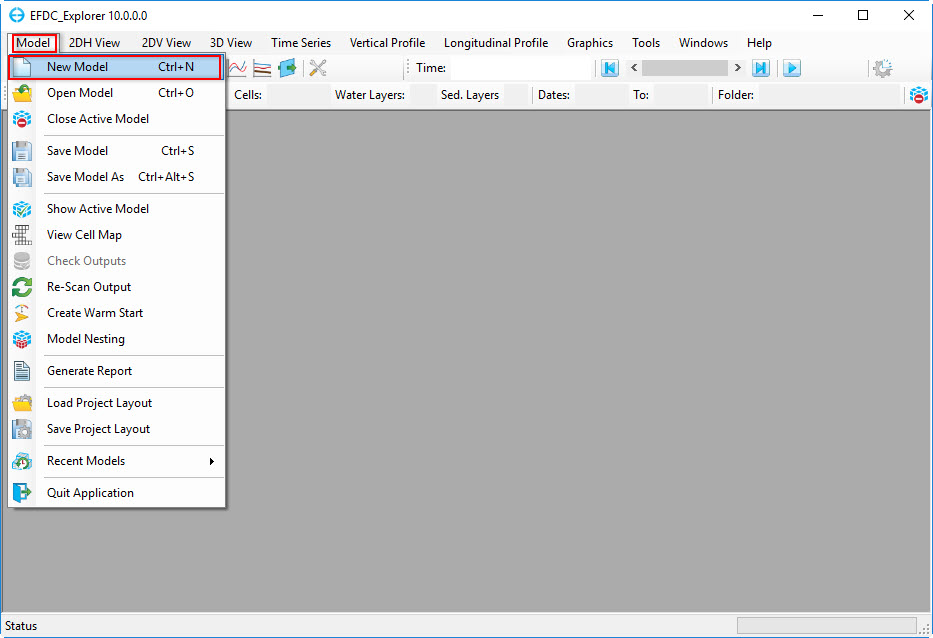
Figure 1. Open a new model from EE main form (1).
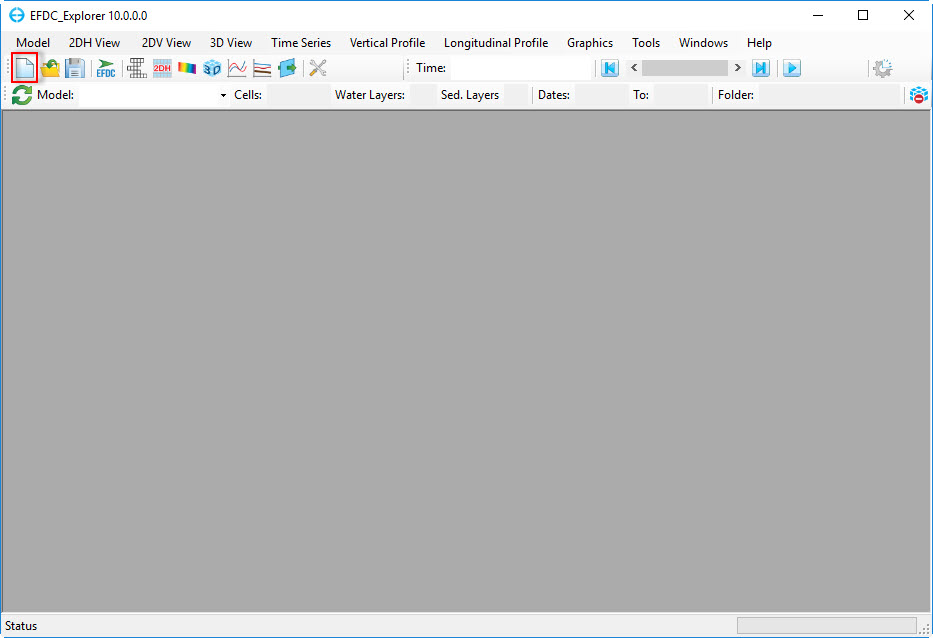
Figure 2. Open a new model from EE main form (2).
3. In GridTool form, select Import Grid from Files and then click Import Grids button. The Import Grid form appears, select grid type first by choosing from the drop-down list then check on Multiple grid files. Browse to the grid files Figure 3. After selecting a number of grid files then click Open button.
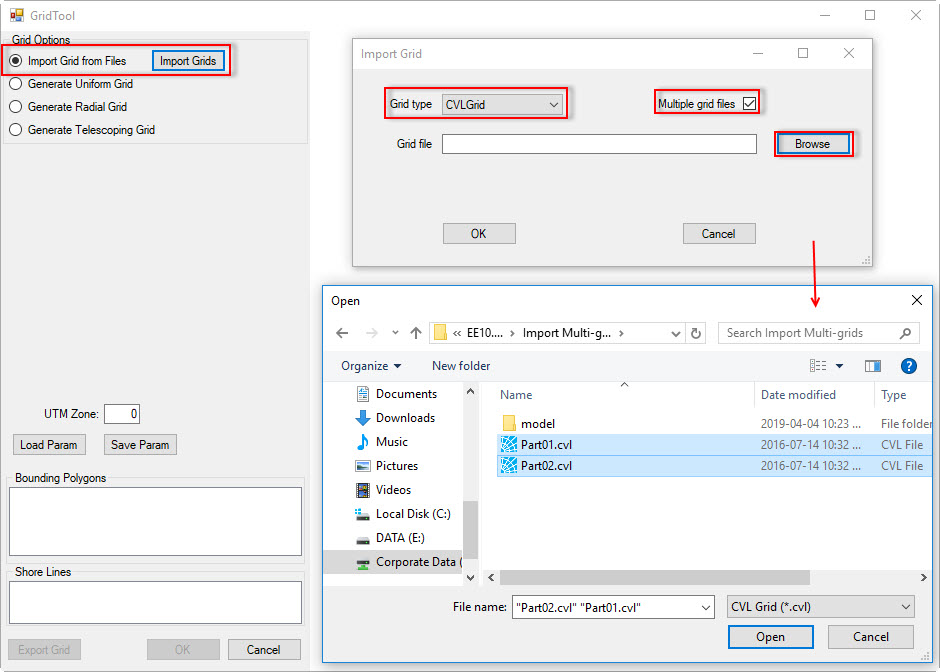
Figure 3. Import multiple grid files.
4. Then save grids by clicking OK
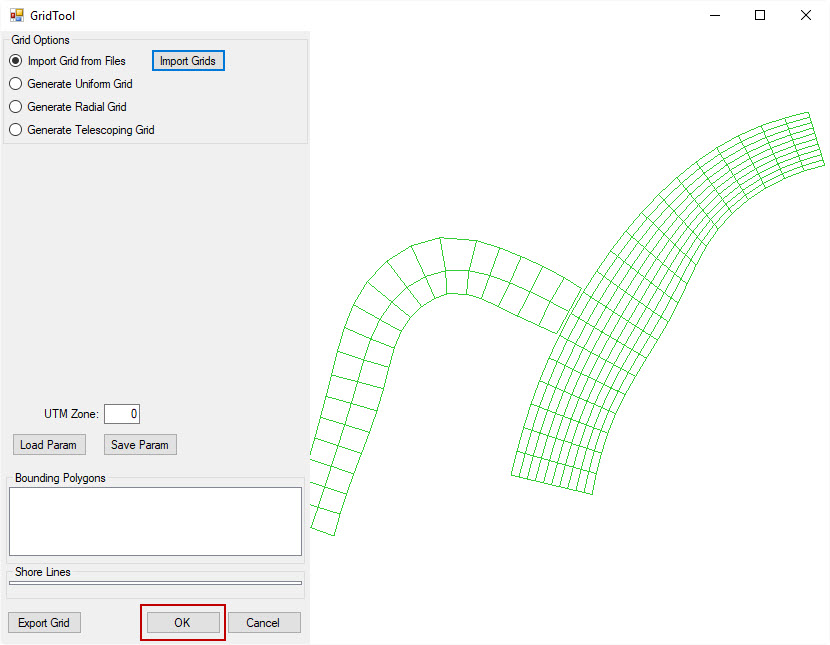
Figure 4. Save multiple grids.
5. Next, users proceed to 2DH View 
6. Click  to Add a New EFDC View Layer. Setting for the Primary Group is Model Grid and use the scroll bar to browse to the parameter Grid Connections as shown in Figure 5.

Figure 5. View Options.
7. To be able to edit grid cells, turn on the edit mode of the Grid Connection layer on View Layer control (click on the pencil icon)
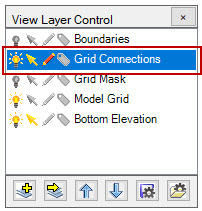 Figure 6. View Layer Control.
8. RMC on a cell you wish to connect to another grid. This will provide a pop-up with the options and user can select one of four available options as shown in Figure 7.
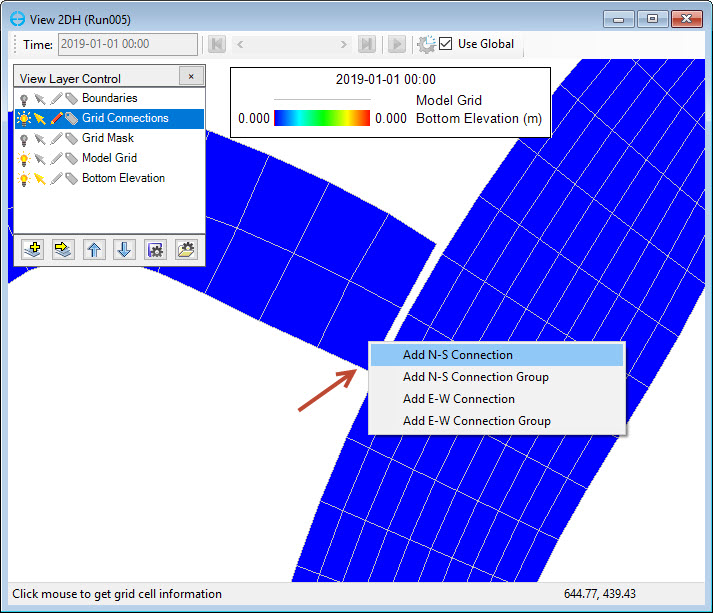
Figure 7. Cell connection options.
9. LMC to select the adjoining cell on the other grid.

Figure 8. Joining cell to another grid.
10. The N-S connection between two cells is then be created as shown in Figure 9.
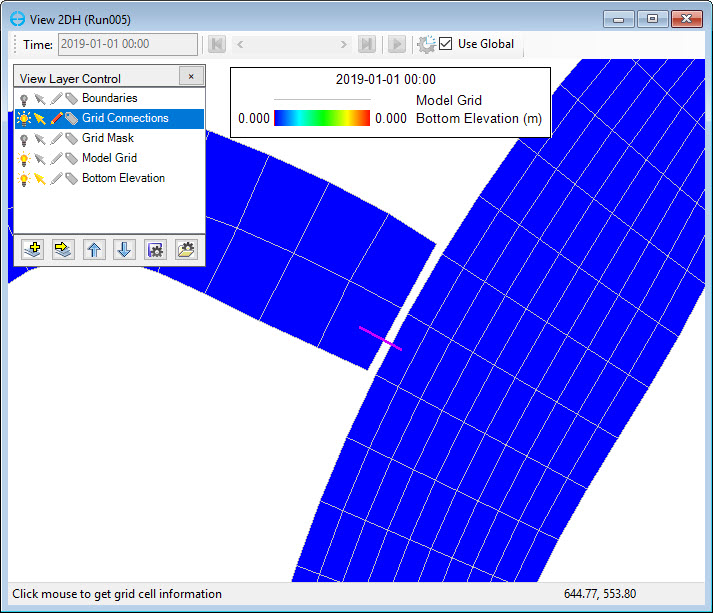
Figure 9. The N-S connection.