...
In the Nutrient Options & Parameters frame: (1) click Temperature Effects button to edit temperature effects as shown in 3407874 Figure 27; (2) click Carbon button to edit the Carbon parameters as shown in 3407874 Figure 28; (3) Nitrogen button to edit the Nitrogen parameters as shown in 3407874in Figure 29; (4) Phosphorus button to edit the Phosphorus parameters as shown in 3407874 Figure 30; (5) COD&DO button to edit the COD&DO parameters as shown in 3407874 Figure 31.
In the Sorption Options frame: Select Total Active Metal (TAM) Based option and (6) click Modify Parameters buttons to edit Nutrient Sorption Parameters as shown in 3407874 Figure 32.
Anchor Figure 26 Figure 26

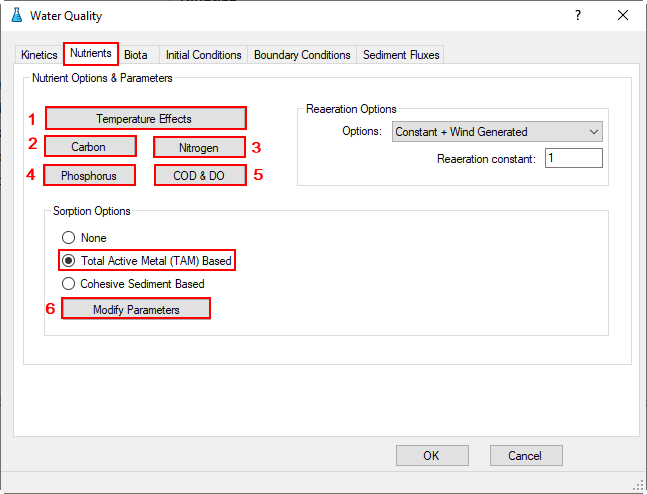
Figure 26. Water Quality Tab: Nutrients.
...
To configure the algae to the model, proceed to the Biota tab which is shown in 3407874 Figure 33. As By default, there are four algal groups, in this model only one algal group (green algae) is simulated (3407874Figure 22).
In Algae and Macrophyte Options frame: click Modify button, the form of Algae and Macrophyte Options will be appeared as shown in 3407874Figure 34. Select Green Algae for Select Biota. Settings for the current green algae through General, Growth, Basal Metabolism, Predation tabs as shown from 3407874 Figure 34 to 3407874Figure 37.
In the Solar Radiation Option for Photosynthesis frame (3407874Figure 33), select source drop-down and select Constant, then click Modify button to edit solar radiation parameters as shown in 3407874 Figure 38.
Anchor Figure 33 Figure 33
...
Proceed to the Initial Conditions tab as shown in Figure 40. In Initial Conditions frame, click on the drop-down menu and select Spatially Constant, then click Const IC's button to edit then edit each of the water quality parameters shown in Figure 40 and Figure 41.
Anchor Figure 40 Figure 40
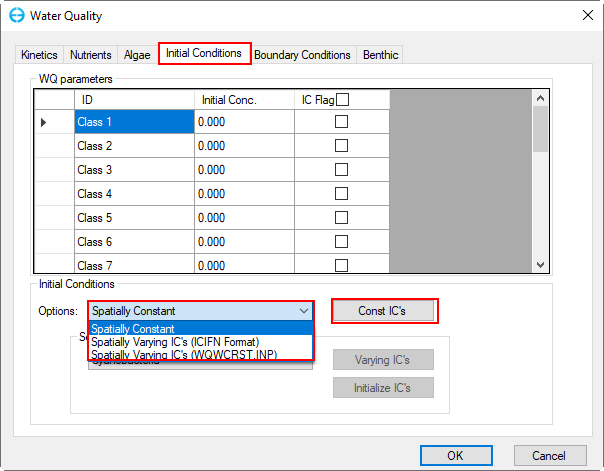
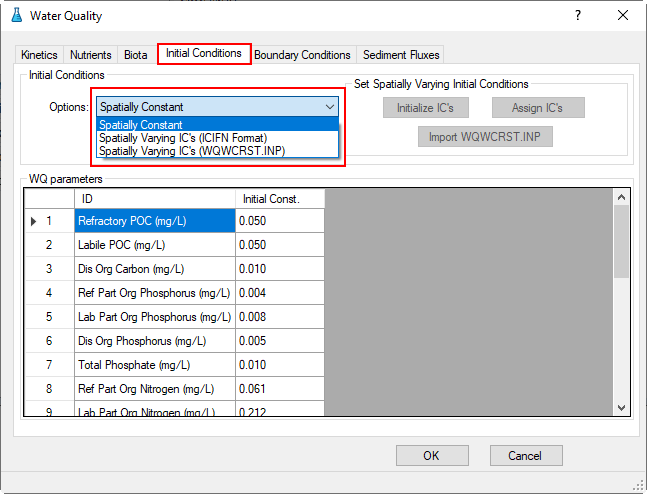
Figure 40. Water Quality Tab: Initial Conditions.
Anchor Figure 41 Figure 41 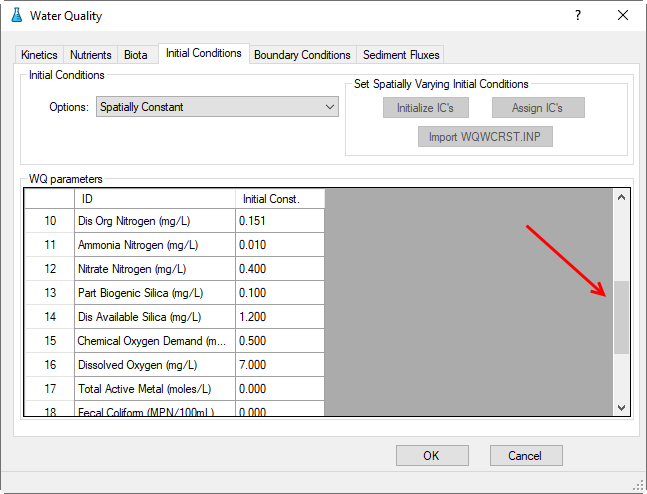
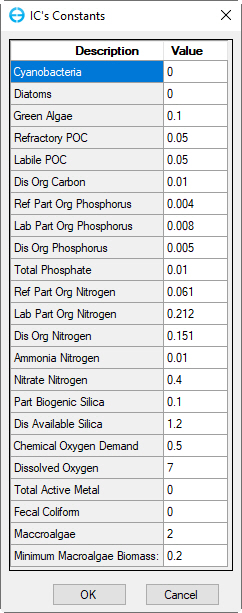
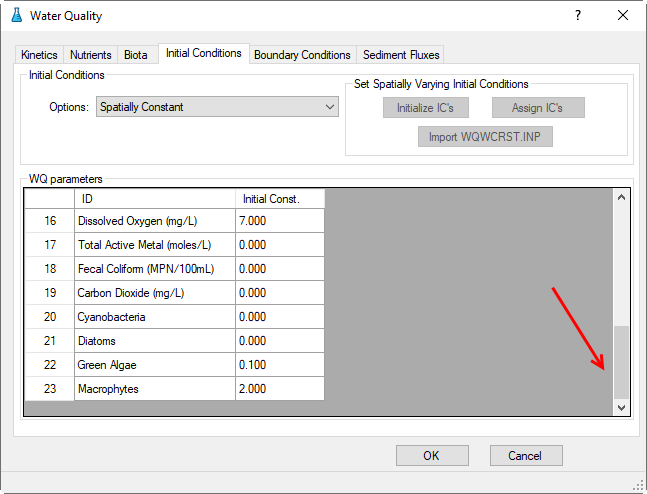
Figure 41. WQ Initial Conditions Parameters.
...
3.2.6 Water Quality – Benthic
1. Proceed to the Benthic Sediment Fluxes tab shown in Figure 64.
2. Select Modify Parameters button will now displayed under Sediment Diagenesis Option & Parameters as Fluxes as shown in Figure 65.
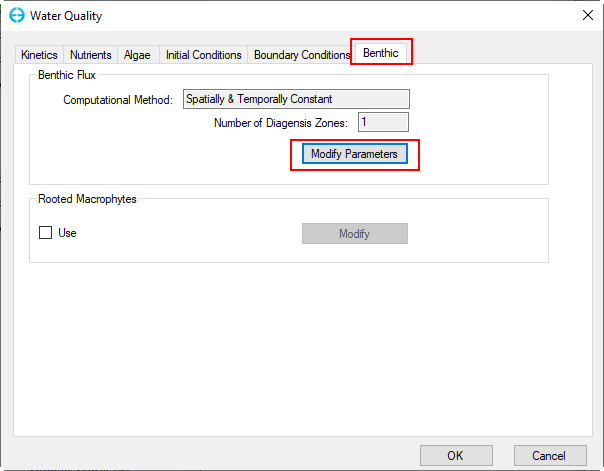
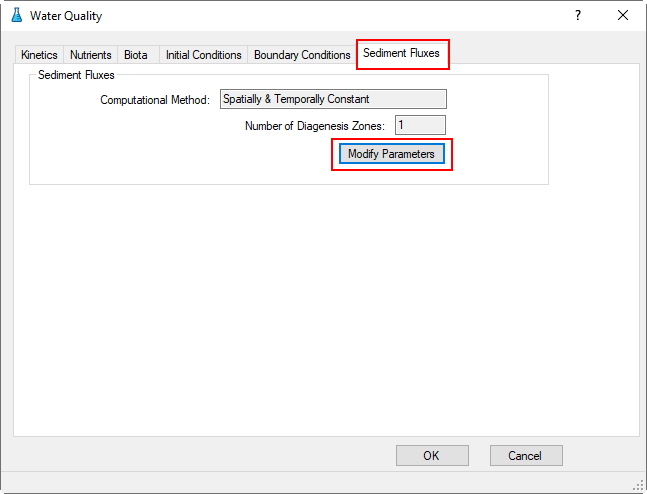
Figure 64. Water Quality Tab: BenthicSediment Fluxes.
3. From the Sediment Diagenesis Option & Parameters form (Figure 65), in the top frame, Benthic Nutrient Flux Method select Spatially & Temporally Constant; enter the values of parameters in the Constant Benthic Flux Rates frame as shown in Figure 65.
...
6. RMC on Linkage sub-option to open EFDC Model Linkages form, in the EFDC_+ Explorer Linkage Linkage frame, set the Linkage Output Frequency under EFDC_+ Explorer Linkage frame to 60 minutes as shown in Figure 70.
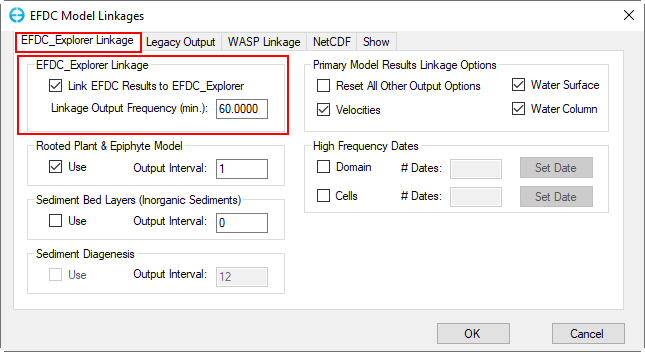
Figure 70. Main Form – Timing / Linkage: EFDC_+ Explorer Linkage.
7. Click the Run EDFC  icon on the toolbar to open EFDC+ Run Options form; in the General tab, enter the number of OMP Threads, KMP Offset and check the executable file then click Run EFDC+ button to run the model as shown in Figure 71.
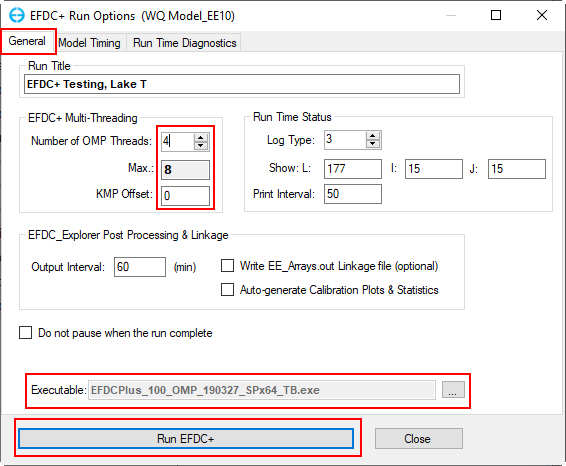
Figure 71 EFDC+ Run Options form.
5. Viewing Water Quality
...
in EFDC
...
+ Explorer
1. 2DH View
1. After the model run has finished, from the toolbar, click on icon or select 2DH View\ New 2DH View from the toolbar to open the 2DH View window as in Figure 72 below.
...