There are a number of options for this viewing and modifying the cell properties which are accessed from the menu as shown in Figure 1 and they are described below:
Anchor Figure 1 Figure 1
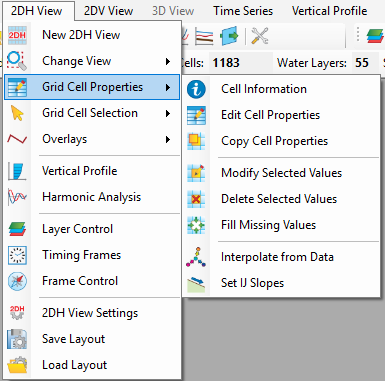
Figure 1. Grid Cell Properties.
- Cell Information: when this option is selected, LMC on a grid cell and the information of the cell will be displayed in a yellow rectangle as shown in Figure 2. This function also can be activated by selecting the
 icon in the main toolbar.
...
- Edit Cell Properties: This function is only enable enabled for surface values layer at initial condition (click ie time = 0. Clicking the
 button on the timing frame in case when the model has output ). Then to return to the IC. To make changes, click on pencil icon on the layer in Layer Control (e.g Bottom Elevation layer) then select Edit Cell Properties from main menu or menu toolbar. After that Then LMC on a grid cell , a while cause theProperties form appearsto display. There are two columns in the form, Parameter and Value columns. Now the The user can now modify value of the bottom elevation then click and click the Apply button to finish. (see Figure 3)
Anchor Figure 3 Figure 3
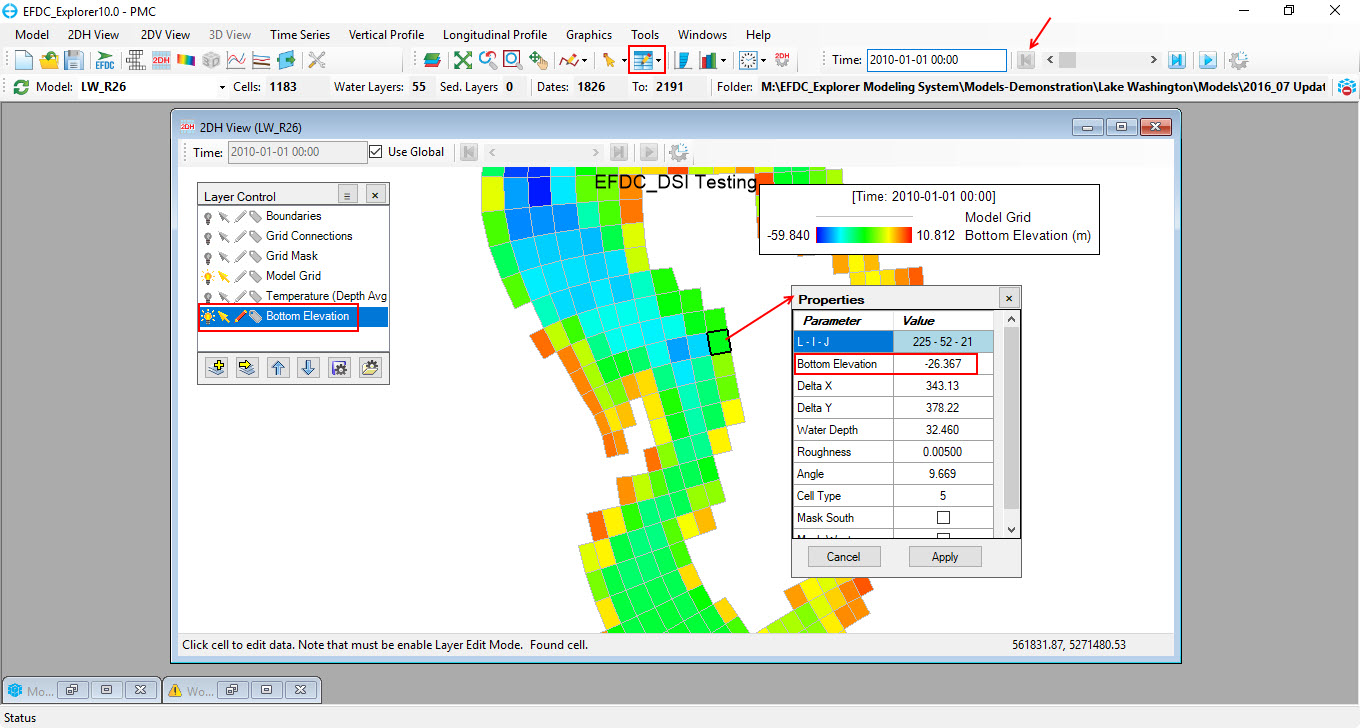
Figure 3. Edit Cell Propertiescell properties.
- Copy Cell Properties: This function allows the user to select a "Source Cellsource cell" and then copy the current property into subsequent cells (or "Target Celltarget cells"). First the user must turn on the Copy Cell Properties button on the toolbar. The "Source Cell" source cell is then selected using Ctrl-CTRL+LMC. An input box is then displayed and filled with the Source Cellsource cell's property. The user can change the value or use the operator method noted above. The user can then apply the "Source Cell" source cell property (or whatever is in the property input box) by Ctrl-CTRL+RMC. The user can keep applying the value or operator by continuing to Ctrl-CTRL+RMC on the desired cells.
- Modify Selected Values: There are two cases for cell selected, one cell selected or multiple cells selected. To modify a cell value, firstly first click the pencil icon on the layer the user want to modify values of cells. (wants to modify eg Bottom Elevation) , then LMC on a cell, next and select Modify Selected Values from the main menu or menu toolbar. A Modify Selection form appears, and the selected layer is shown in Parameter to Modify, . Value to Apply is where the user enter enters the value want to apply be applied for the cell selected. After putting entering the the value to into the box, click the Add button, then the . The cell is then assigned with a new value which is equal to original value of the cell plus with the value in the box, it is also similarly to other operators as . A similar approach is taken with other operators using the Subtract, Multiply and Divide buttons. If the user skip skips using the operators button then click and clicks the Assign button immediately then the cell is assigned with whatever the value was in the box. (see Figure 4)
Anchor Figure 4 Figure 4
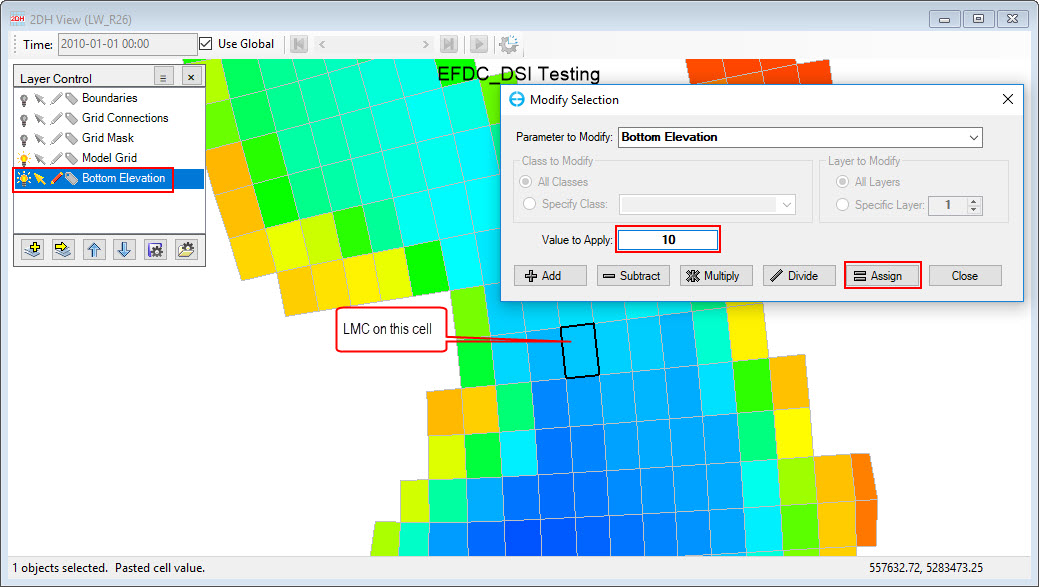
Figure 4. Modify Selected Values selected values for a cell.
Modify To modify values for multiple cells , it is mostly similarly similar to the approach for one cell, big thing differently is with the main dfference being that the user has to should select multiple cells before selecting the Modify Selected values Values feature. There are several options to select multiple cells. it is These are described in Grid Cell Selection from the main menu of 2DH View or from  icon in toolbar. An example for modifying values of multiple cells is shown in Figure 5.
Anchor Figure 5 Figure 5
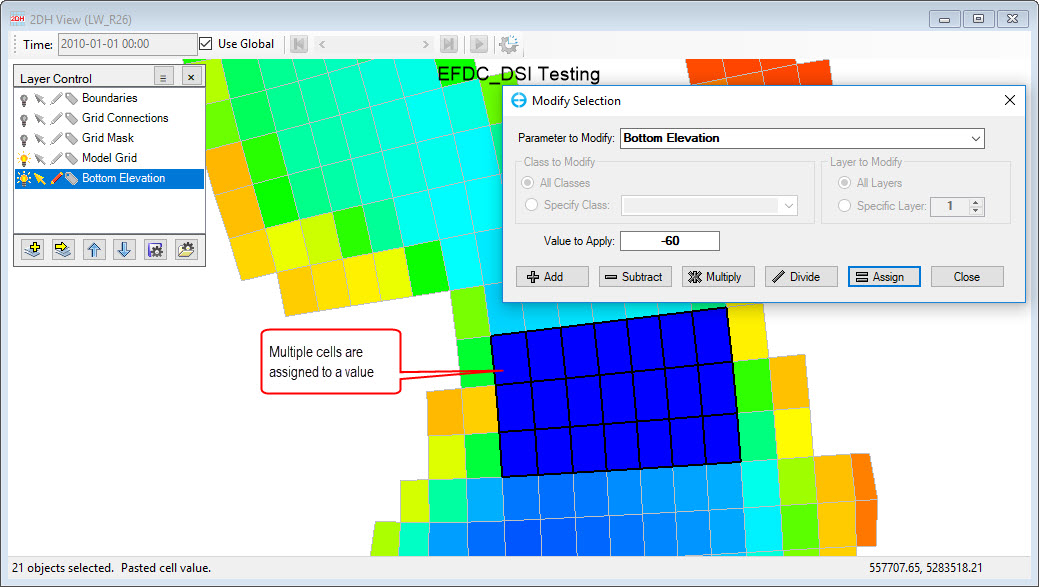
Figure 5. Modify Selected Values selected values for multiple cells.
- Delete Selected Values: This feature allows the user to delete value values of cells selected. when When this feature is applied, the value of cells are shown as "NaN . (see "(not a number) as seen in Figure 6).
Anchor Figure 6 Figure 6
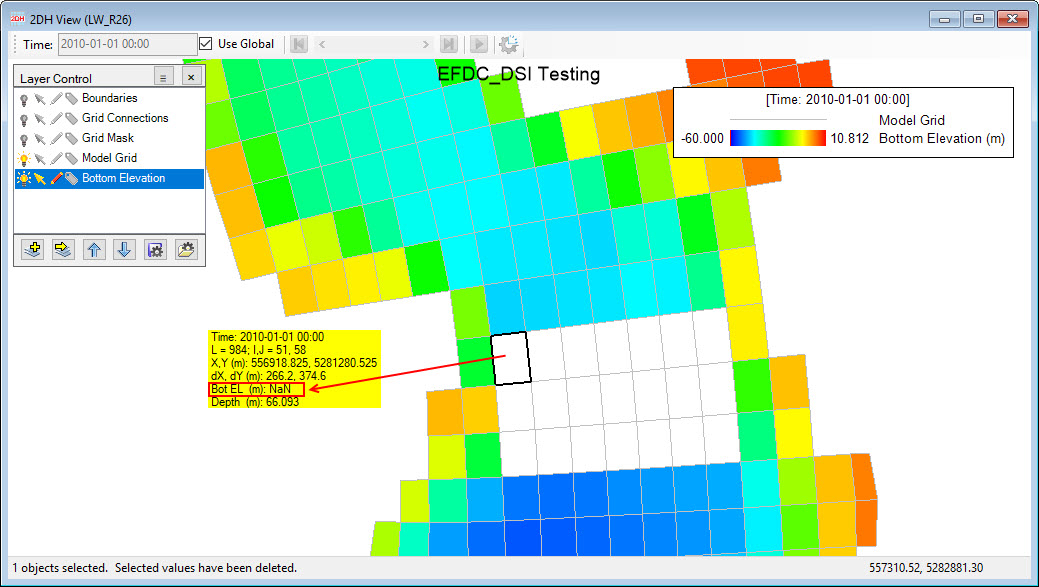
Figure 6. Delete Selected Values selected values of cells.
- Fill Missing Values: The user need to should select cells which is have missing values then this feature is chose, the Fill Missing Values form appears, check is displayed. Check on one of two two options, Selected Cells and or All Grid Cells then click OK button as shown in Figure 7. After that interpolated The data is filled then interpolated to the fill these cells as shown in Figure 8.
Anchor Figure 7 Figure 7
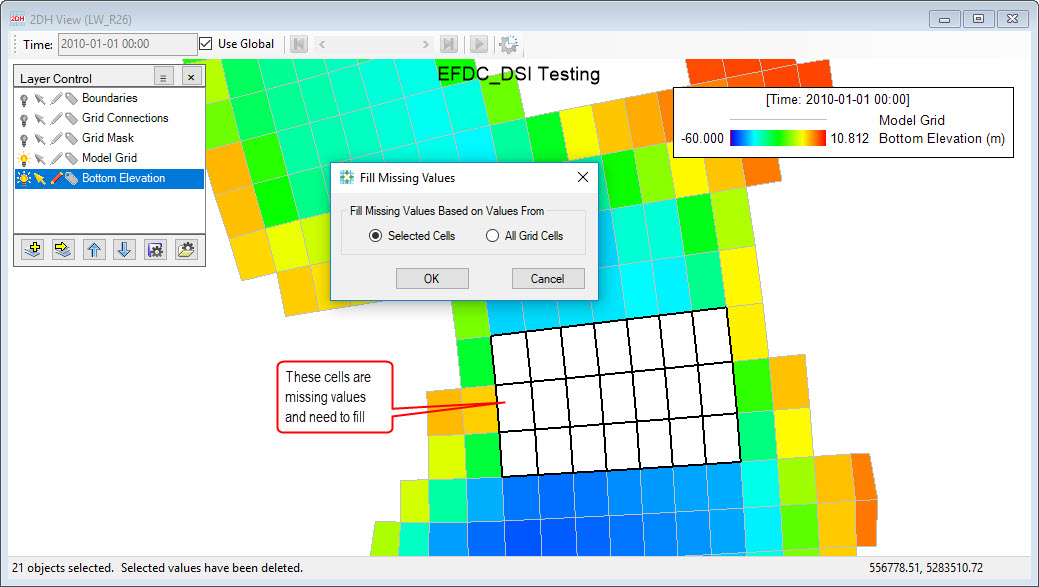
Figure 7. Fill Missing Values missing values of cells (1).
Anchor Figure 8 Figure 8
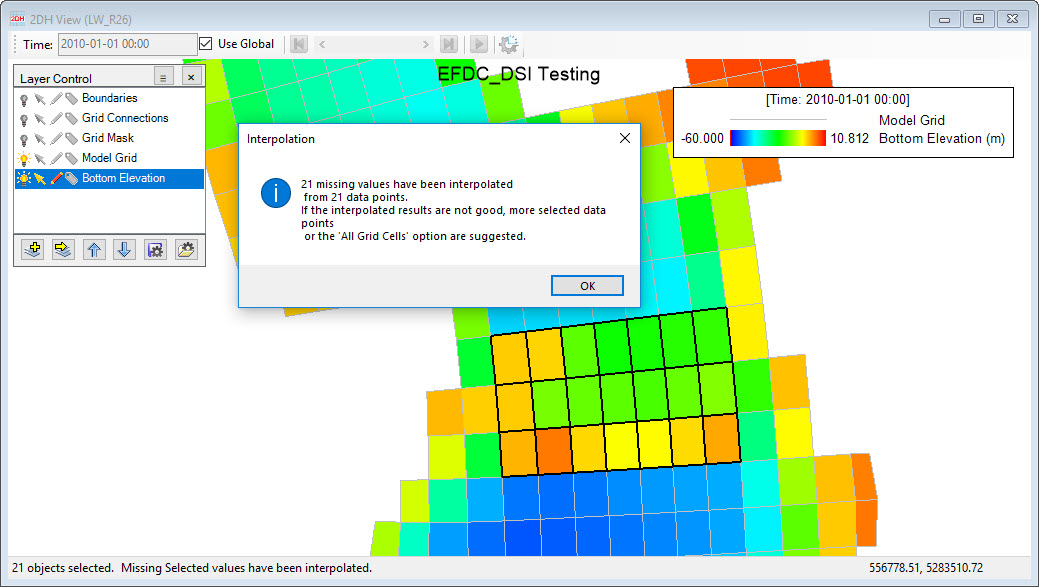
Figure 8. Fill Missing Values missing values of cells (2).
- Interpolate from Data: This feature allows the user to fill data for cells from an external data file. To use this feature, The the user needs to first load the XYZ scatter data file first, next then click on pencil symbol of the layer ( e.g Bottom Elevation layer) , then select cells by using the Grid Cell Selection. Next select Interpolation from Data, a form of Data Interpolation appears, check on and the Data Interpolation form will be displayed. Check the Use box and Selected Cells then click OK button as shown in Figure 9.
...
Figure 9. Interpolate from Data.
- Set IJ Slopes: Applies This applies a constant bed slope to the cells in the I direction or J direction or both IJ directions, starting . Start with a specified initial bottom elevation by putting a value to Start Value then enter a value for I Slope and J Slope. If the entered slope is positive the bottom elevations will decrease with higher I's and J's. The inverse is true if the entered slope is negative. The Assign Slope form is shown in Figure 10 and allows the user to enter values for Start Value, I Slope, J Slope and Target Cells options. Result Results of slope assignment is are shown in Figure 11.
Anchor Figure 10 Figure 10
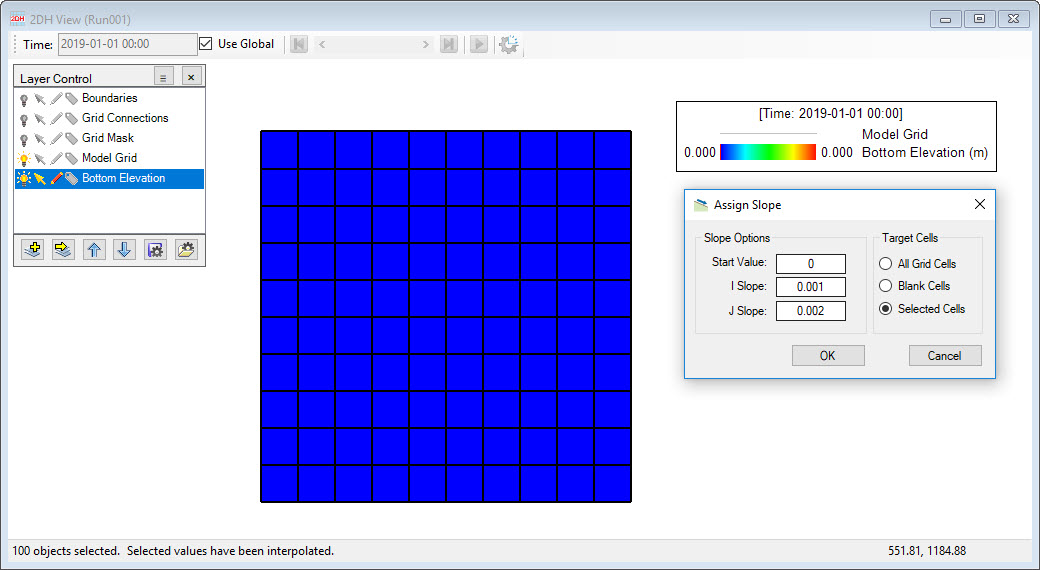
Figure 10. Set IJ Slopes slope (1).
Anchor Figure 11 Figure 11
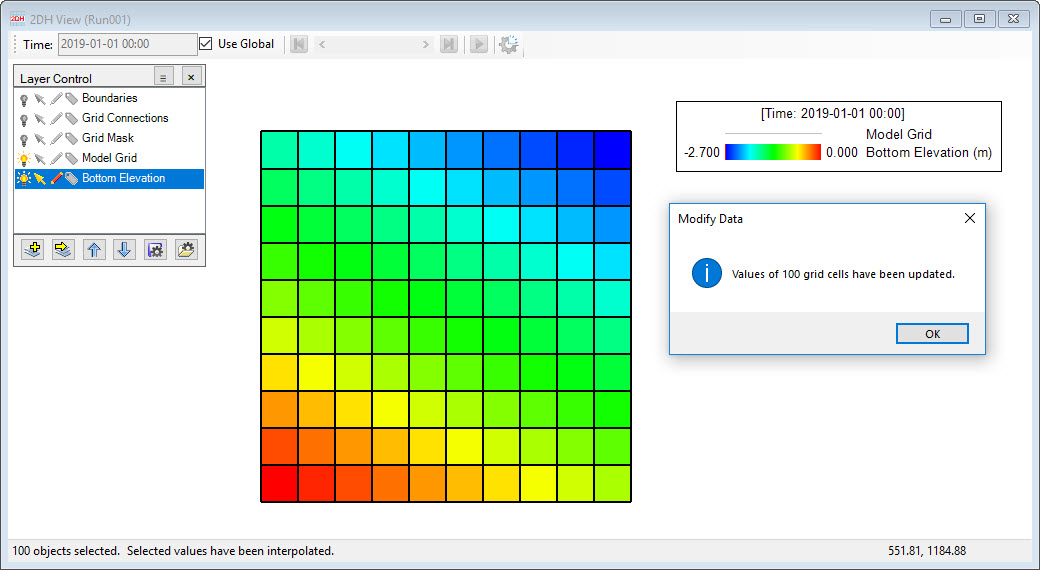
Figure 11. Set IJ Slopes IJ slope (2).