...
Figure 1. Toolbar menu for Graphics.
Generate Image
...
Figure 2 presents the Generate Image option.
- Export Options : the user should select a name for the image and select the folder to save the image by clicking the Browse button. By default, the image will be saved in the #analysis folder of the active model.
- Separated Images: if the option is selected, each window is exported into individual images
- Single Image: if the option is selected, all window is exported into a single image.
- Select window to export: all available windows with details information are listed in the form, and the user can check the box for the interested window to export.
- If more than one window is selected in the Select window to export frame, the Arrange Windows button is available. The Arrange Windows form is shown in Figure 3. The user is able to select No.of Rows, No.of Columns, Column Width and Row Height.
- By default,the Select window to
...
- export frame only displays the view and plot windows. To display other windows such as model control, work logs, the user check on
...
- the List All
...
- Windows checkbox.
Finally, click OK button to start exporting images.
| Anchor | ||||
|---|---|---|---|---|
|
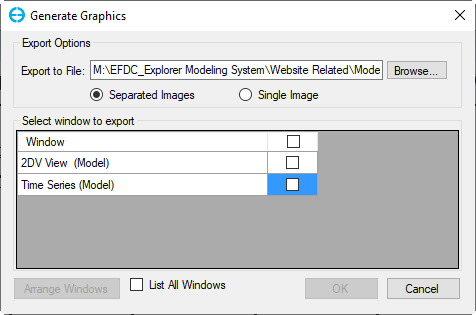
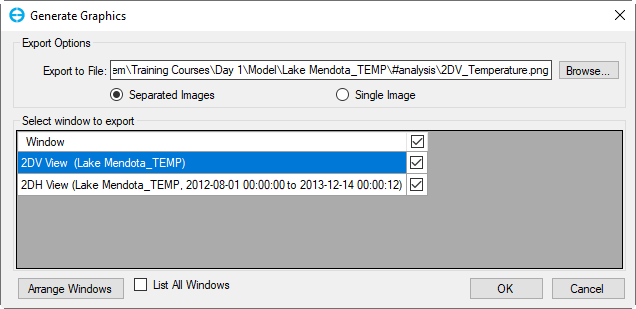
Figure 2. Screen Export form for Generate Image.
Anchor Figure 3 Figure 3
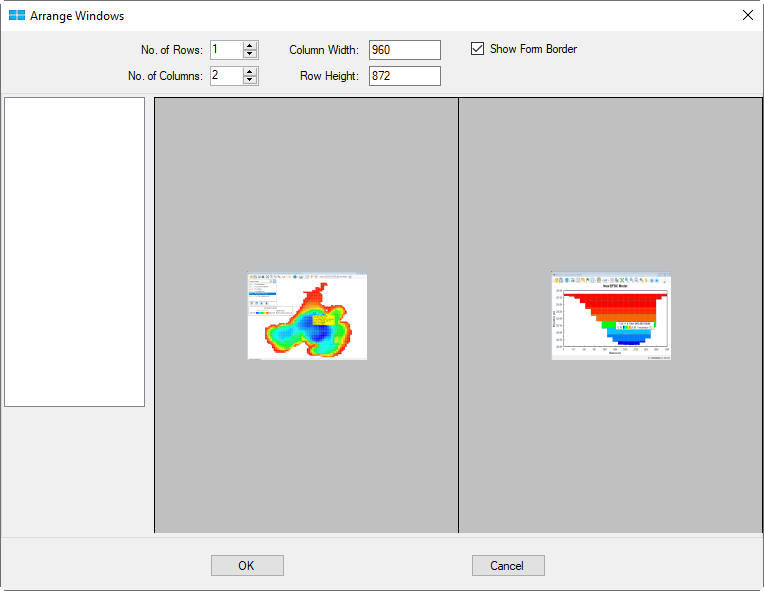
Figure 3. Arrange Windows
Generate Animation
...
...
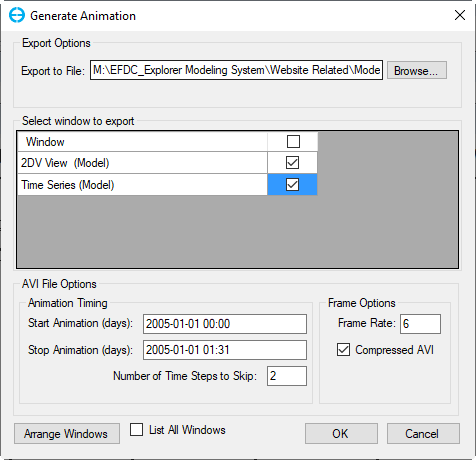
Figure 4 shows the Generate Animation form.
- Export Options : the user should select a name for the animation and select the folder to save the animation by clicking the Browse button. By default, the animation will be saved in the format of *.avi file in the #analysis folder of the active model.
- Select window to export: all available windows with details information are listed in the form, and the user can check the box for the interested window to export.
- AVI File Options: the user can set up the exporting file. Animation Timing: the time for the AVI file needs to be inside the model timing. It is able to add Grid, Symbols and Labels or Background image by checking the box in Initial Frame Options.
- If more than one window is selected in the Select window to export frame, the Arrange Windows button is available. The Arrange Windows form is shown in Figure 5. The user is able to select No.of Rows, No.of Columns, Column Width and Row Height.
- By default,the Select window to export frame only displays the view and plot windows. To display other windows such as model control, work logs, the user check on theList All Windows checkbox.
Finally, click OK button to start exporting images.
Anchor Figure 4 Figure 4
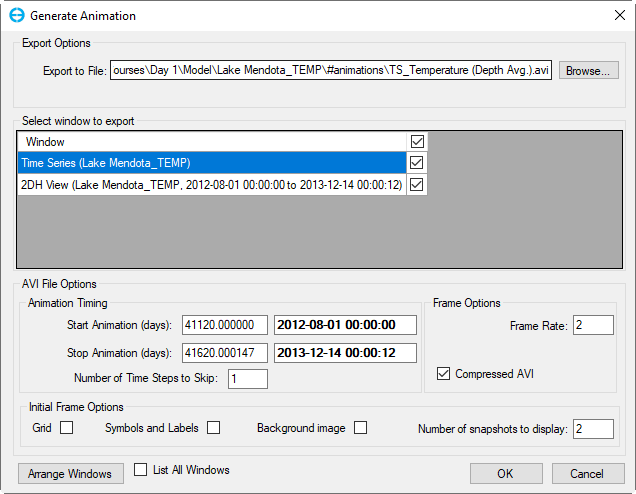
Figure 4. Generate Animation.
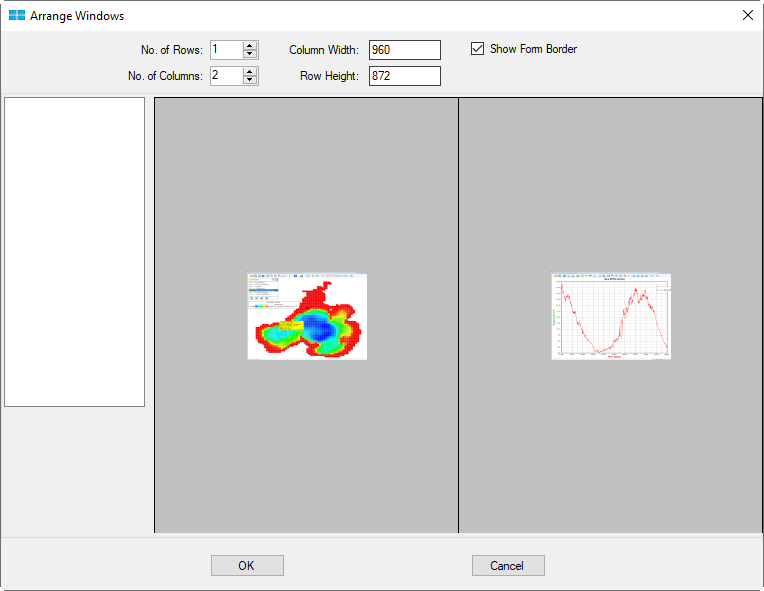
Figure 5. Arrange Windows for Generating Animation.