Setting an EFDC_Explorer model consists mainly of adding, editing, and viewing initial conditions and boundary conditions. In most cases, a feature has to be turned on in the Modules menu item to be editable in Initial Conditions( as shown in Figure 1). The detailed process for turning on modules can be found in Setting EFDC Modules
| Anchor | ||||
|---|---|---|---|---|
|
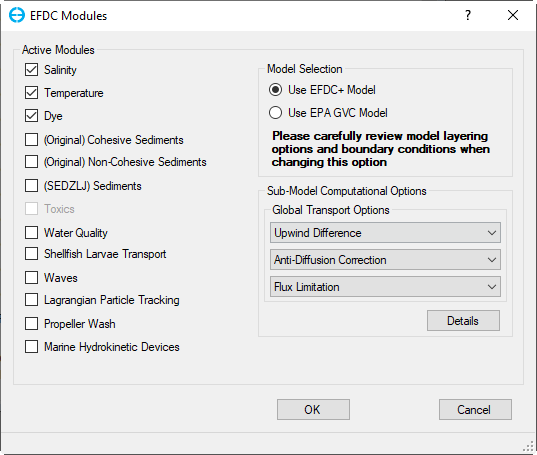
Figure 1. Active Modules form.
...
Once a module is enabled, the user can view the enabled module on the Model Control Form. To assign initial conditions to a module RMC on the corresponding item in Modules and then select Initial Conditions as in Figure 2. Alternatively, the user can also go to the distinct initial Conditions menu item and RMC on the corresponding item.
| Anchor | ||||
|---|---|---|---|---|
|
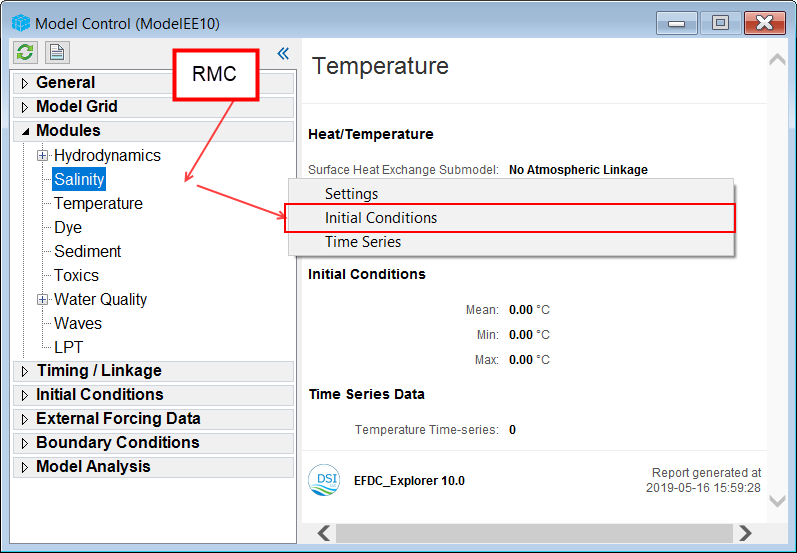
Figure 2. Editing and Viewing Initial Conditions.
...
The process of assigning data series to cells can also be done through the 2DH View View ( as shown in Figure 3) by following the process:
- Choose Boundaries in the Viewing Layer Control.
- Enable Edit by turning on icon
 .
. - RMC on the boundary location cell (or Shift-LMC to select multiple cells then RMC) and click on Add New Boundary Group
Anchor Figure 3 Figure 3
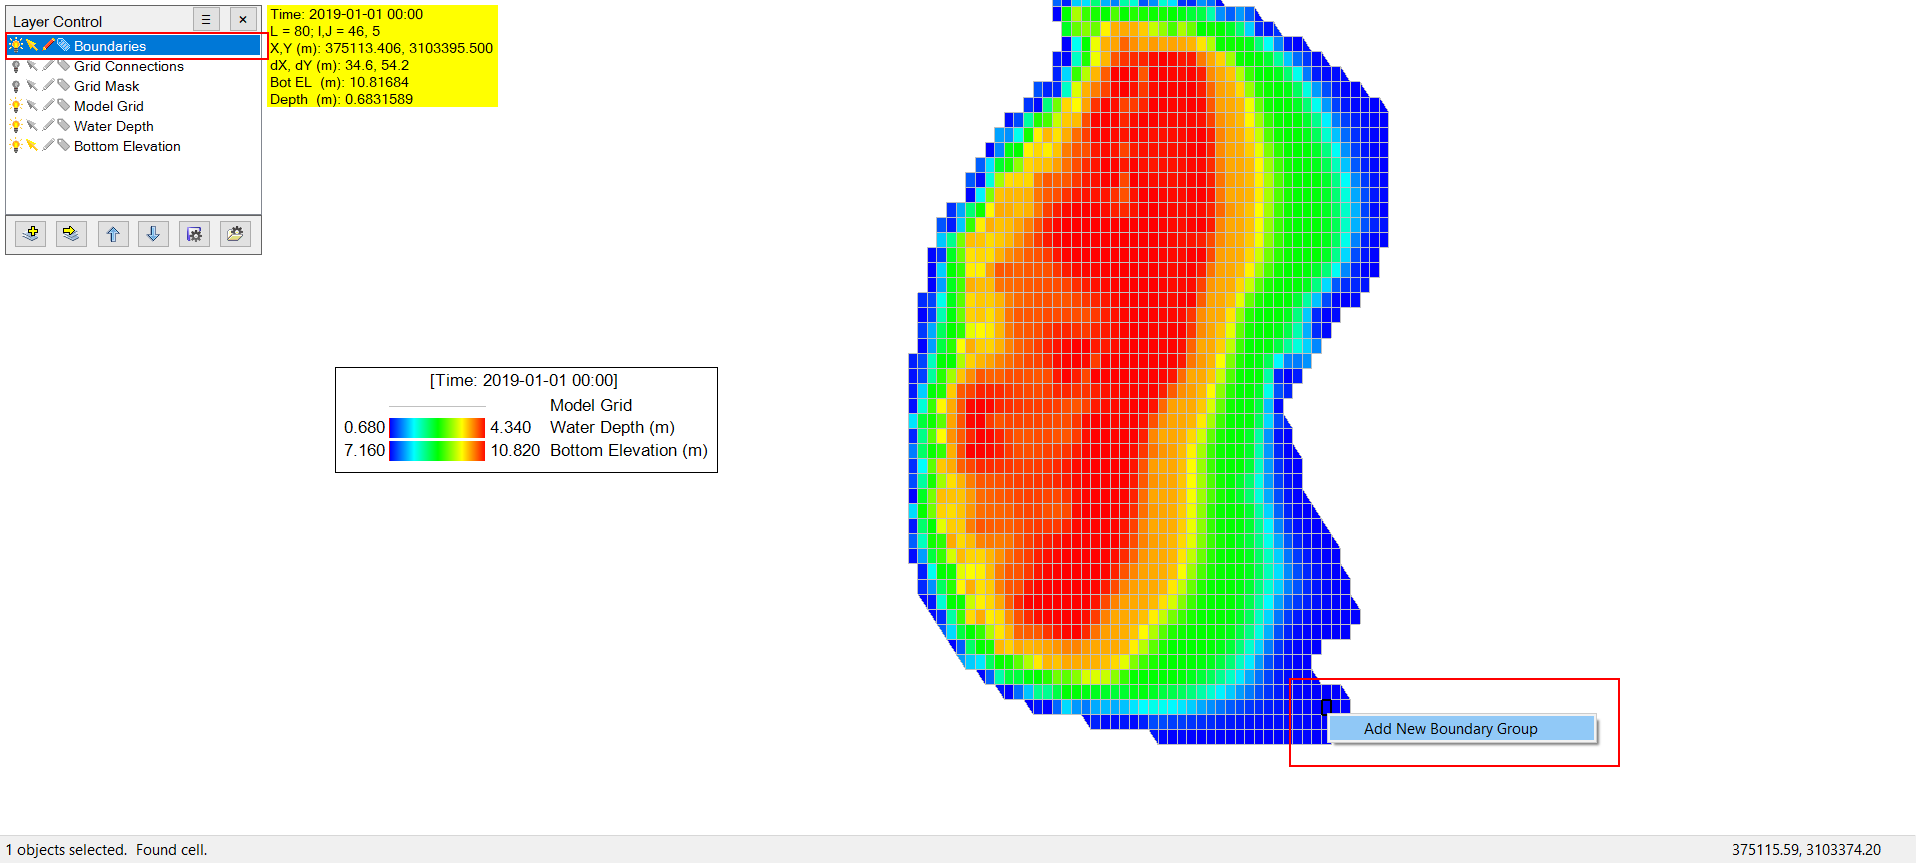
Figure 3. Select cells to add a new boundary.
...
The user is then prompted to choose the boundary group types, and these types are the same as the boundary types in Boundary Conditions menu, with the types South Open Boundary, West Open Boundary, East Open Boundary, North Open Boundary belonging to the Water Level boundary group ( shown in Figure 4 ).
| Anchor | ||||
|---|---|---|---|---|
|

Figure 4. Select boundary group types.
...